I wrote this article to introduce my new (as of 2020) studio space. It’s been a year-long journey through the Covid pandemic preparing the space to move into and getting it organized and fully operational. There are many options for designing a studio, and this article is about the choices I made for configuring a space for both painting and photography.
The following is a photo tour of various areas and aspects of the studio. I will comment on design considerations and choices I made regarding how I configured the space.
For artists and photographers who may be considering making changes to their existing studios or are looking to set up a new, dedicated space for their art production, I have included some diagrams and pics regarding health and safety as well as ventilation concerns, and I’ve also commented on various lighting setups.
Here is a pic of the main entrance to the studio:
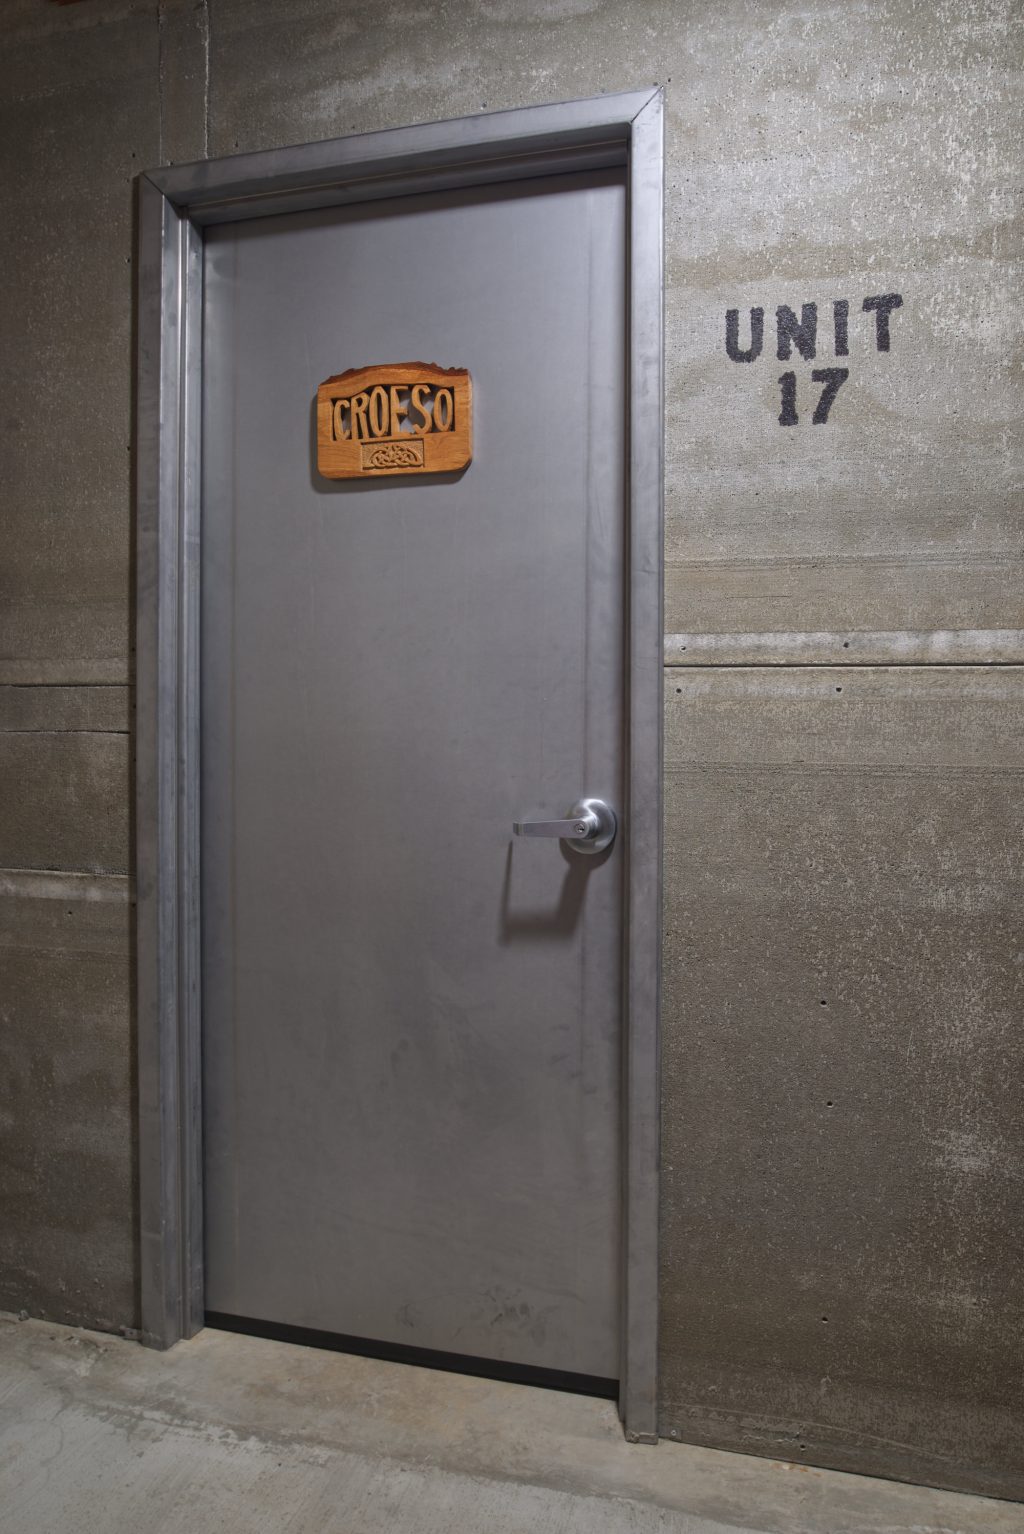
The door sign is hand carved by Welsh carver, Colin Bevan. It is Welsh for “welcome”. Thank you Colin!

Designing and setting up professional studio space for business is a lot of work—there are numerous considerations, and it takes a fair amount of time to decide just how to sort things out properly. On a high level, one requires both natural and artificial light, space(s) to set up an easel for painting, an area for studio photography (including darkroom facilities depending on your work), some storage and perhaps a place or two to sit and have some coffee. It sounds simple enough but, once you start considering workflows and configuring the environment to help you work productively and safely, it’s a bit of a different story and can quickly become a challenge to accommodate all that you need.
At this point, I would like to state that the studio is working out well for me and I’m beginning to really enjoy the space now that I’ve settled in. What a relief, right? I have worked on several projects thus far with no complaints other than these twelve: there is no skylight, no kitchen, the space is under 20,000 square feet (next time, go big), the studio is more than 1 km from the nearest art store, I don’t have 20 foot high ceilings, there are no rugs or a fireplace, there is no couch, no La-Z-Boy chair, no surround sound and no live-in pianist or sax player. On the bright side, there is indoor parking for my bicycle and many small level surfaces for a cup of java to rest on. So, I think things are looking good…
Creating art is essentially work so, in order to be consistently productive, the same rules and behaviours as those of most workplaces, apply. Good studio design supports good working habits and promotes disciplined routines necessary for being productive:
- Artists need a dedicated space with all the tools and supplies and whatever environmental workspace requirements necessary to support the end-to-end process of creating their work.
- The layout and work areas need to be organized in ways that support a variety of tasks so that the space is functional and practical. You must be able to find things easily and have enough space to move around freely with appropriate lighting for working.
- The studio needs to be a safe place to work and be in. I have fatigue mats (because of a concrete floor), places to sit, a fire extinguisher, proper ventilation and an emergency wash station.
- Some artists believe that a studio should serve as a place that can motivate an artist to create—a comfortable environment to help get into a “creative zone”. I don’t fully subscribe to this as I believe that professional artists rarely rely on any need to “feel” like creating new work. It’s what they do and who they are; they just do it. To me, a studio is a dedicated workshop to enable someone to create and work unencumbered. Ideas are developed through action. I don’t believe that any artist should rely on waiting to be “moved” to create—it is action that inspires and action needs to be enabled (where a good working space comes into play)…stop thinking and start doing!
- I believe a studio should be a private space (not shared). This way, there is no need to “reset” a work area—you can simply pick up where you left off previously with whatever setup you had in place for what you were working on. A studio should also be a place where an artist must be able to fully focus and have a dialogue with themselves about their work—this requires privacy and a well set up work environment.
My studio is divided into several areas:
- Office space
- Art and photography studio working area
- Storage spaces
- Washroom and sink
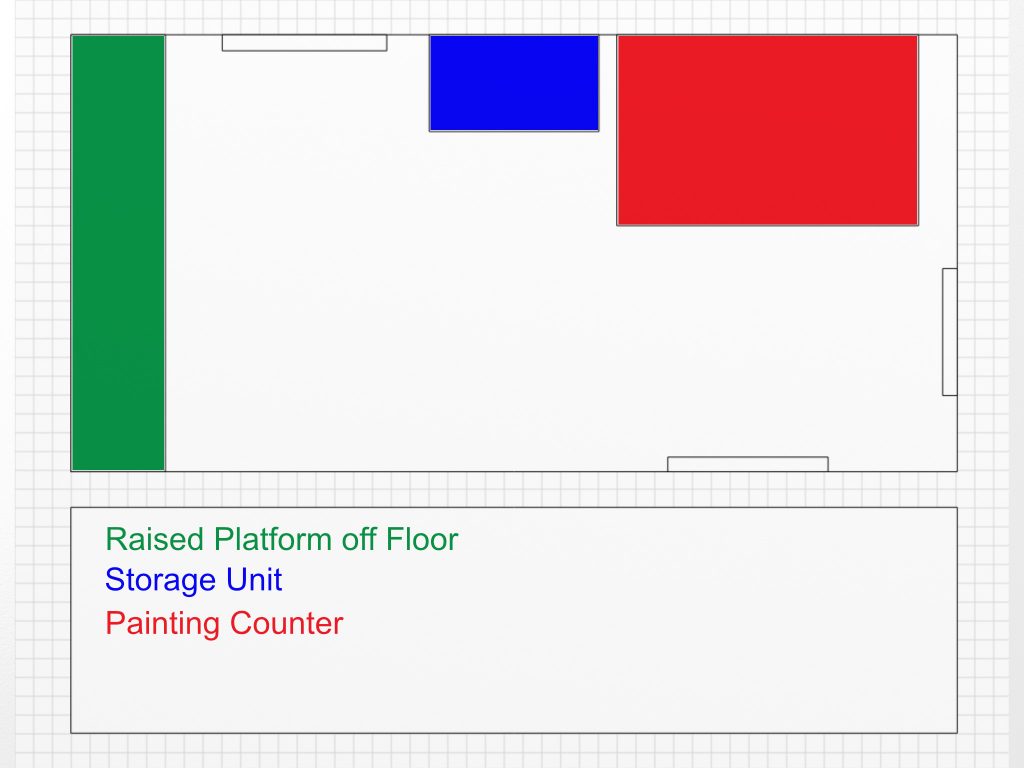
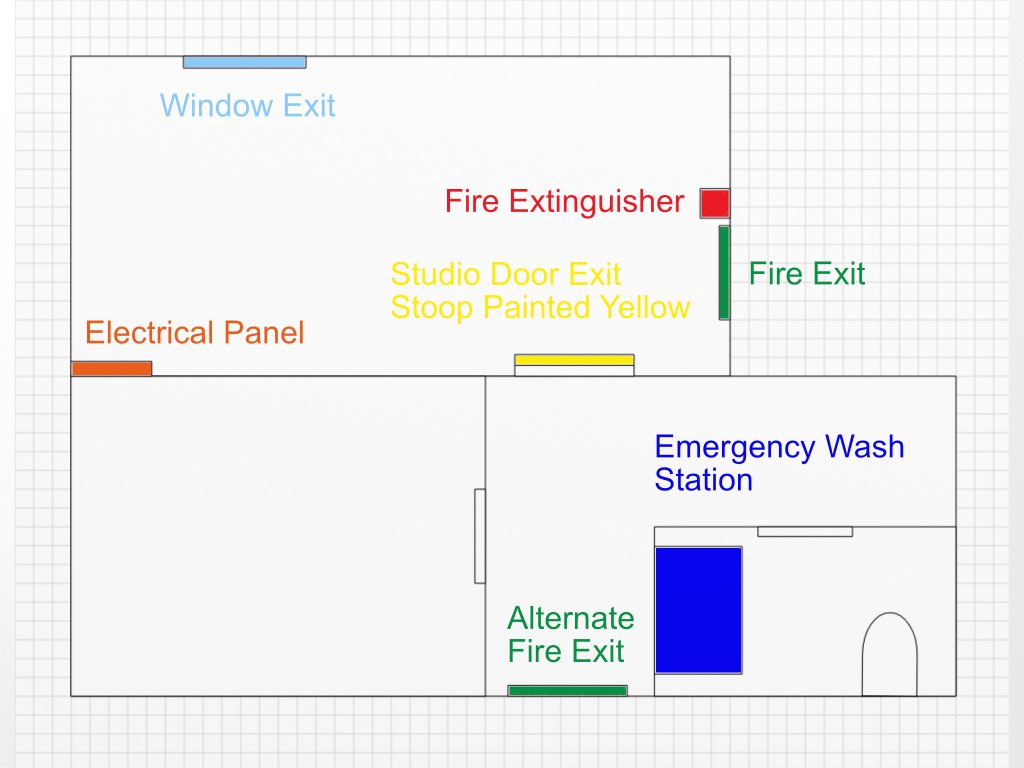
Here is the floor layout of the space:
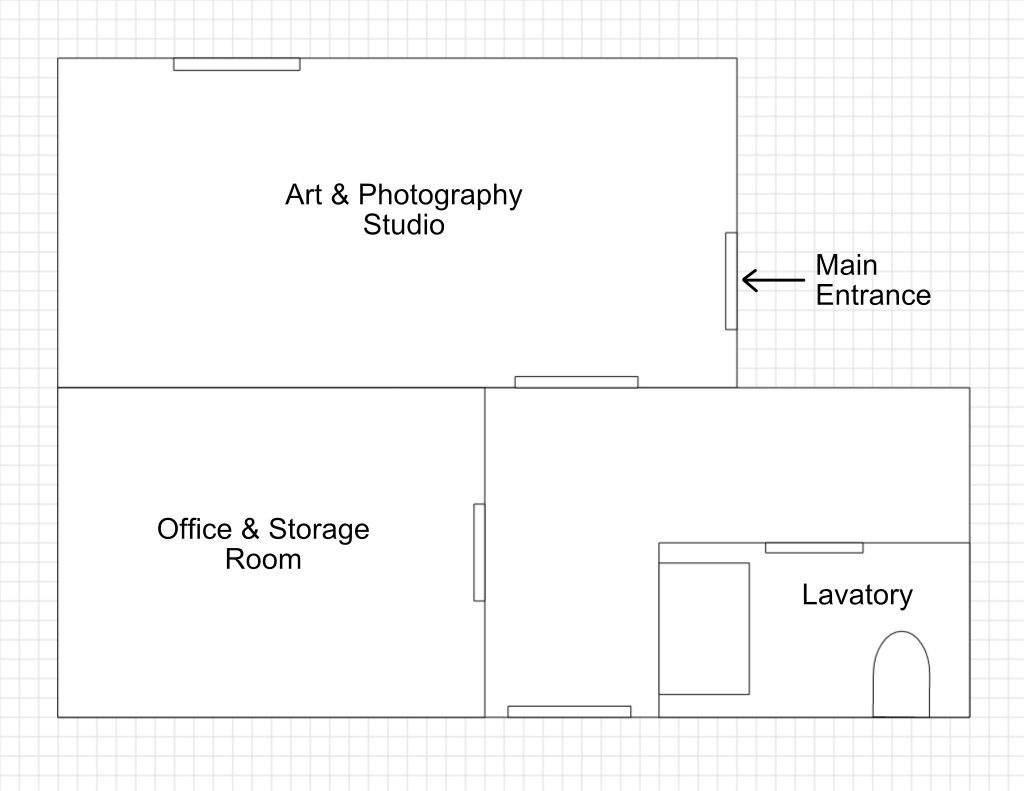
The office space has a desk and storage for paintings. This is also where my printers reside. I use both this office space and the studio itself for digital design work, photo editing, printing, writing, business activities and website administration.
In designing the studio, I had to think creatively about how best to utilize the available space (because I don’t have 20,000 square feet to work with), and I took all of the following into account:
- Studio layout and the various workspaces
- Equipment, supplies and unfinished artwork storage
- Lighting
- Electrical requirements
- HVAC (heating, ventilation and air conditioning)
- Health and Safety
Studio Workspaces:
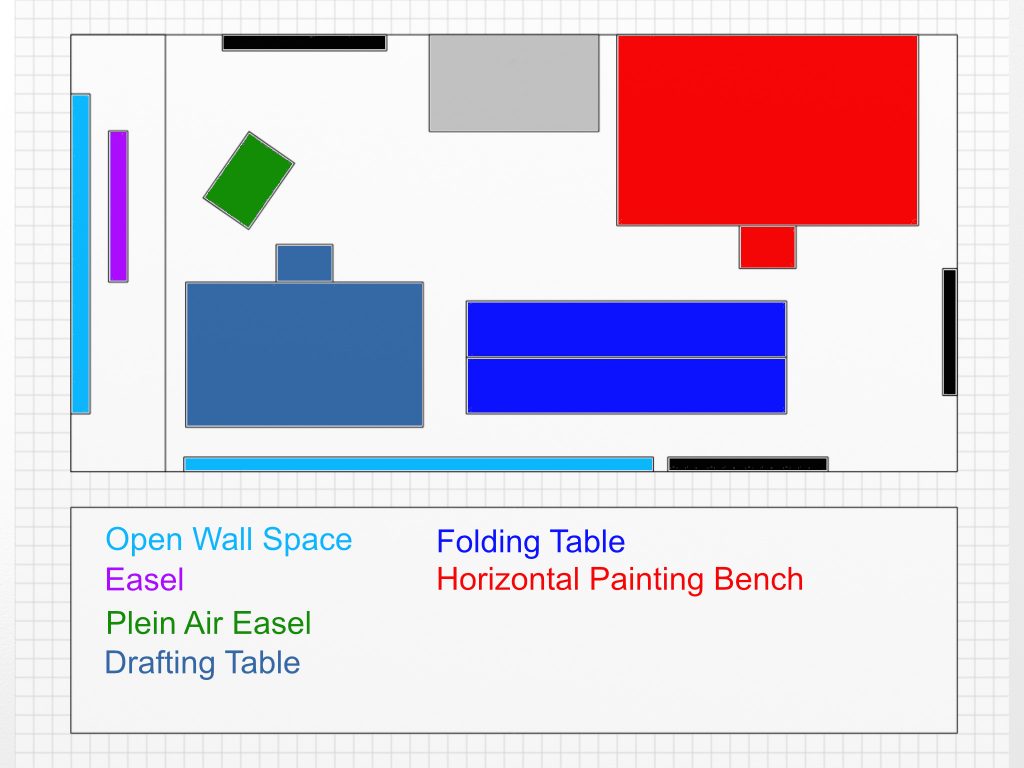
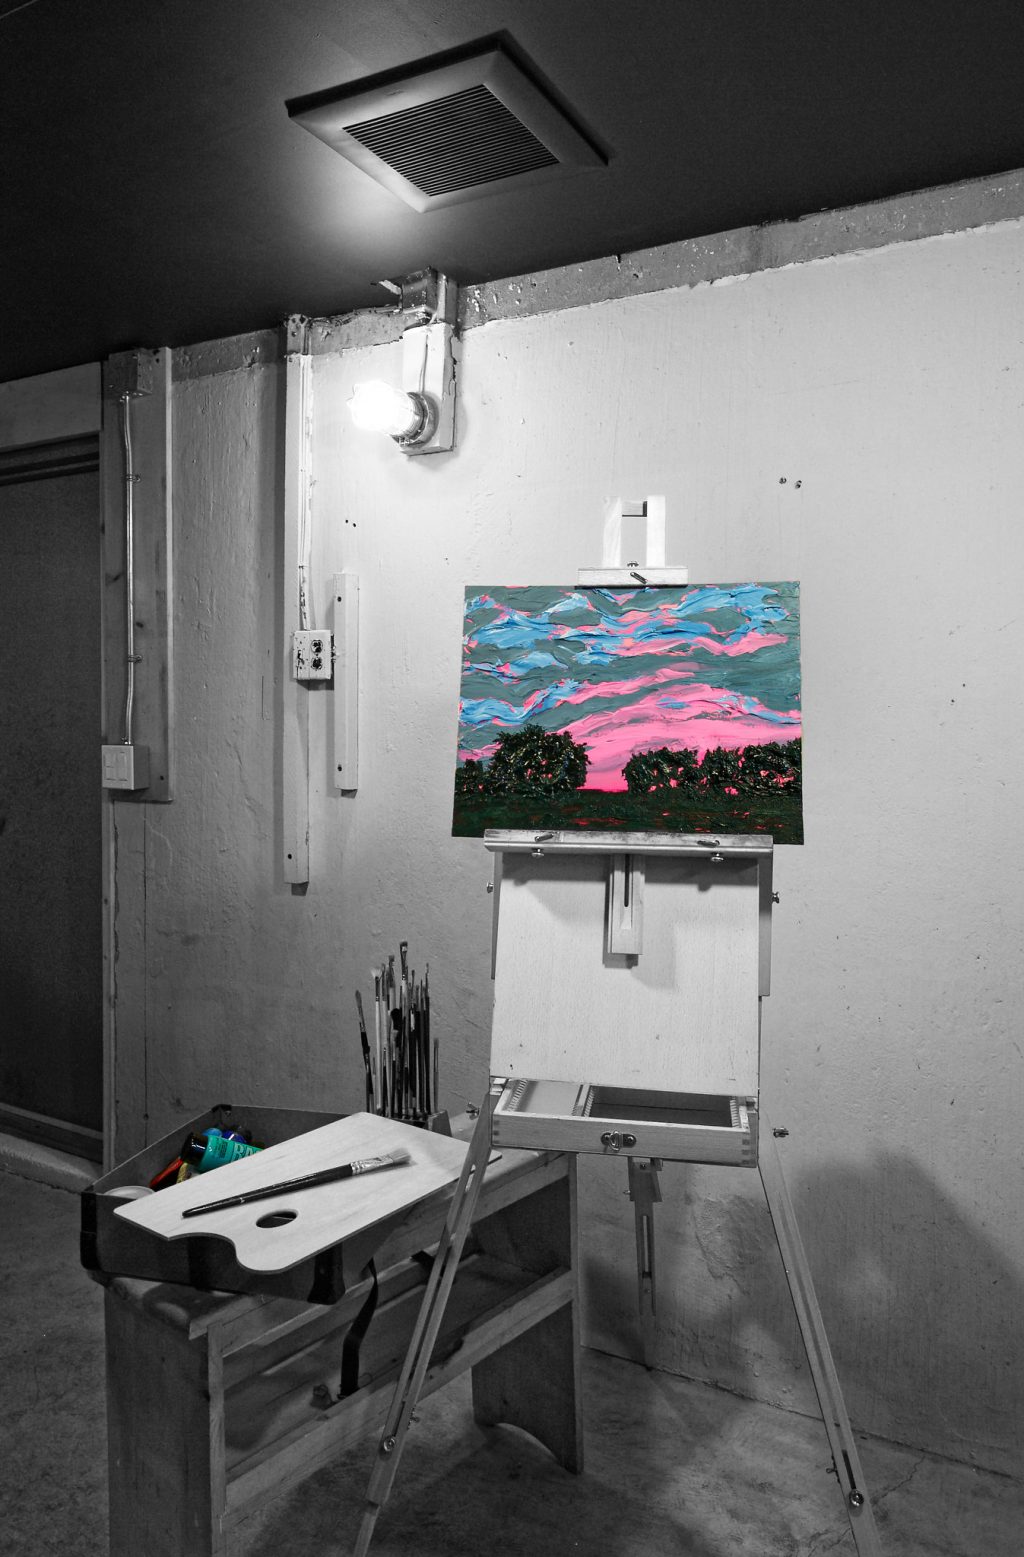
I designed the layout of the studio for making both small and large paintings working on easels, horizontally (countertop or floor), on angled surfaces and also vertically on a wall.
I have several flat surfaces available to work on (as well as the floor).
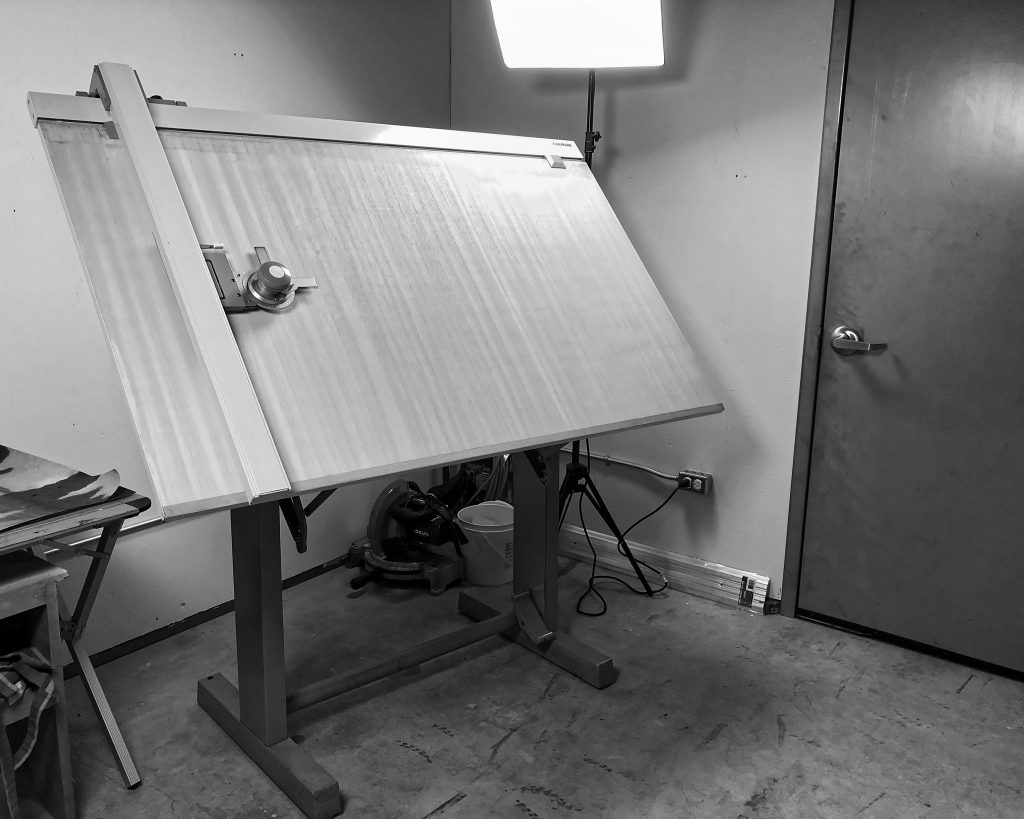
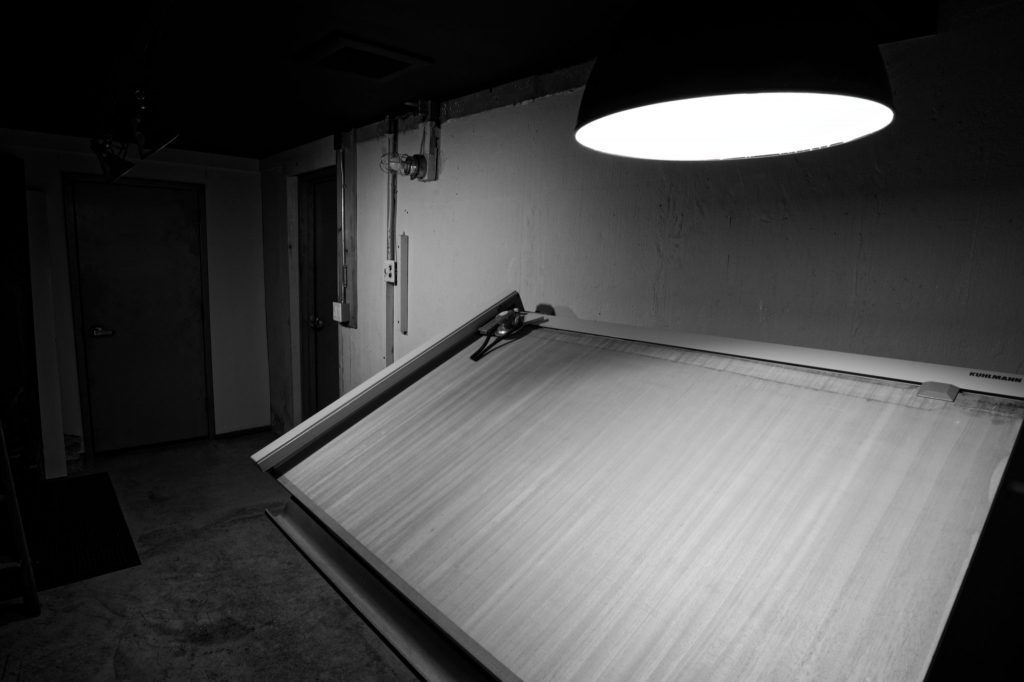
Drafting Table:
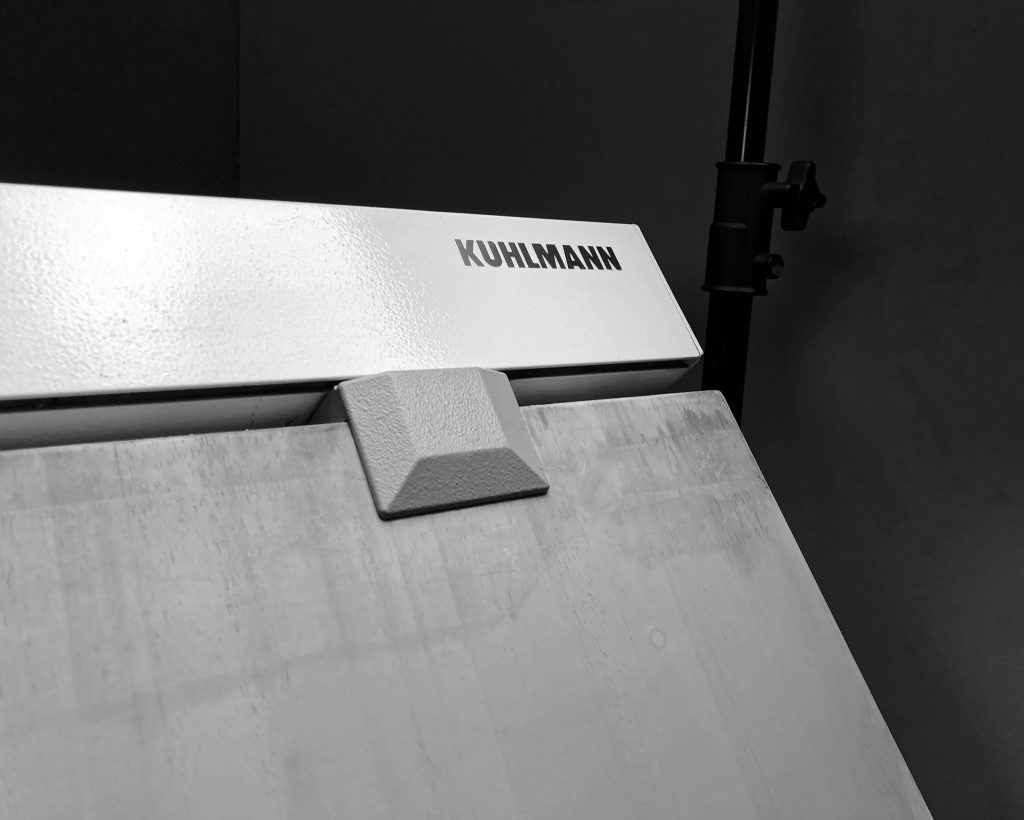
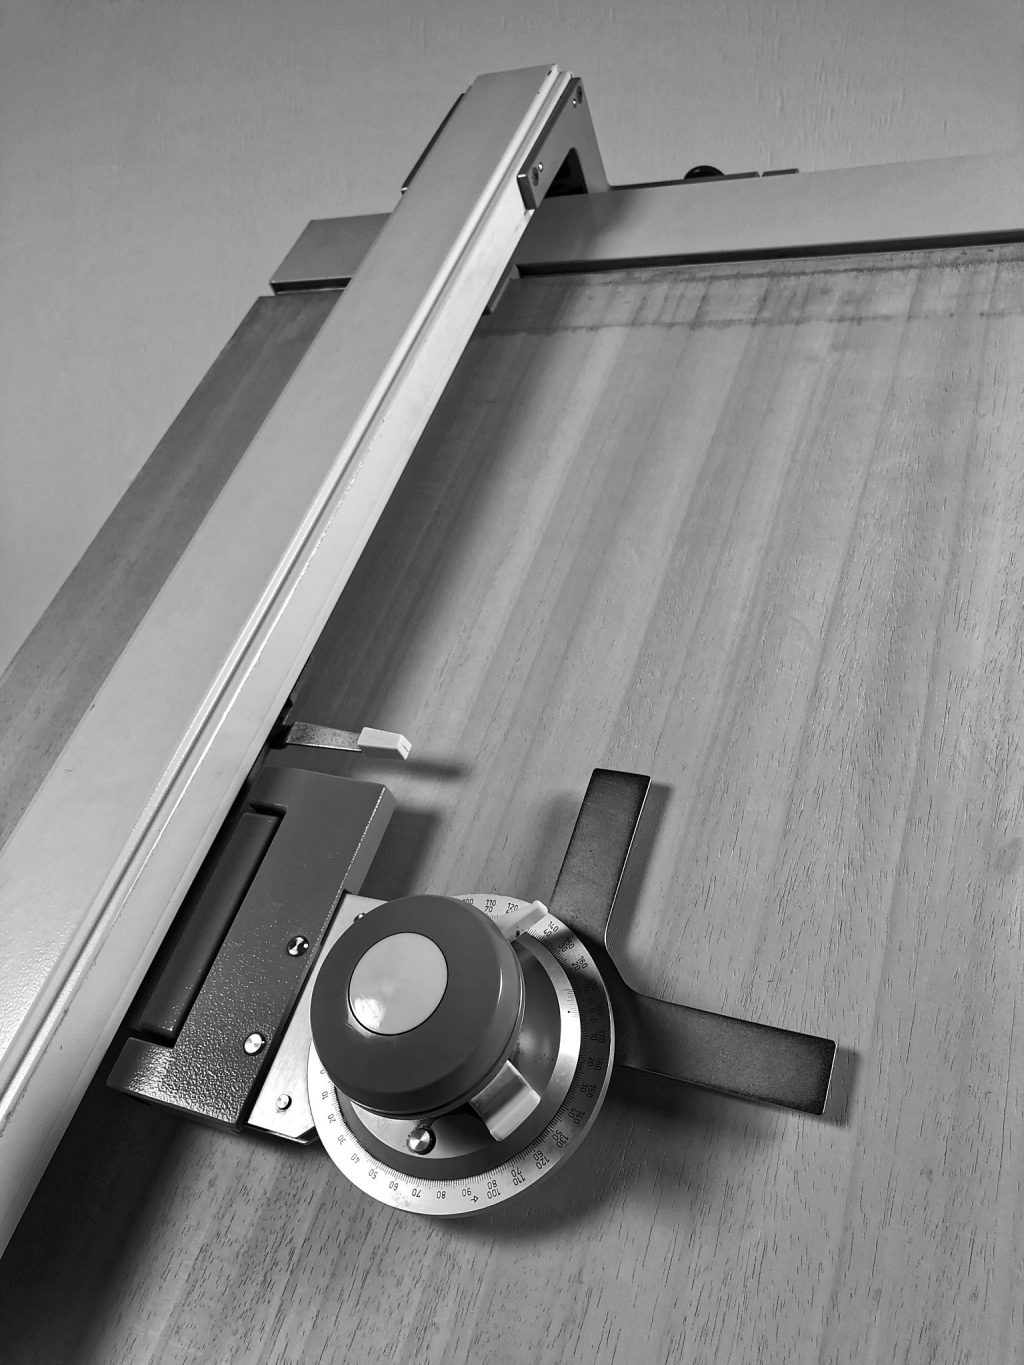
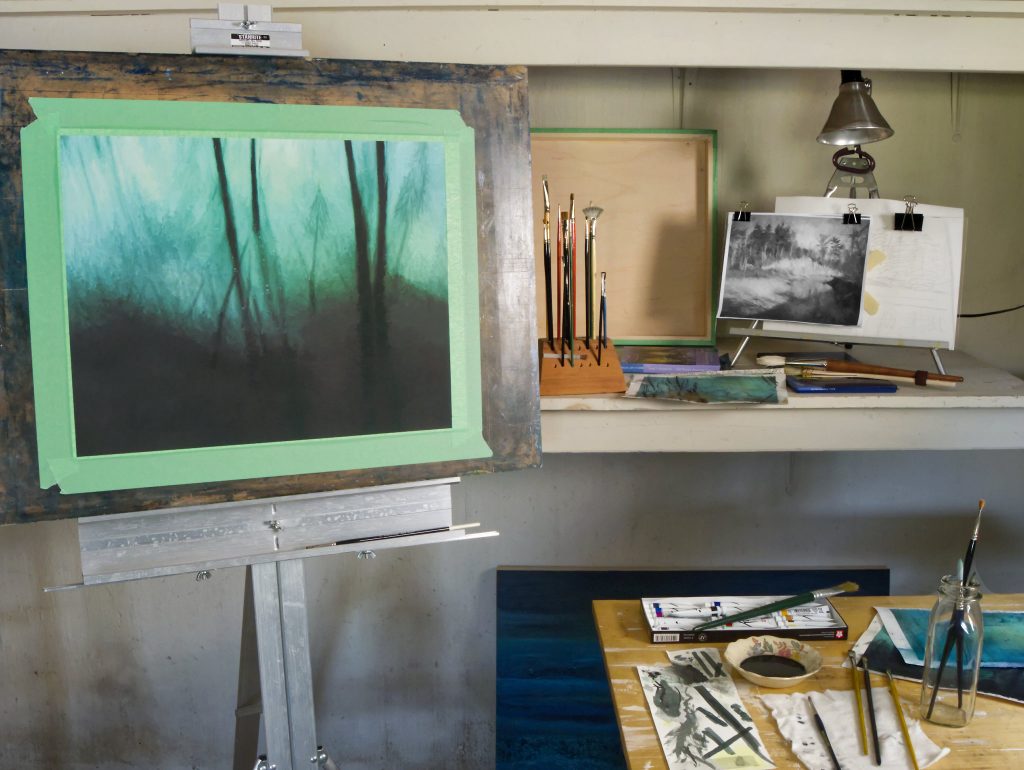
I am very fortunate to have been given a beautiful vintage, German-made professional drafting table with a drafting kit. It was manufactured by Franz Kuhlmann KG (they started making drafting “machines” in 1928), and it is very smooth to operate. Both the height and angle of the table are adjustable, and it locks into position. It’s a real beauty and a joy to work on. It serves as a 3 x 5 foot angled or horizontal surface for digital design work, sketching and drawing. It is also a clean working surface for paper works and prints and a worktable for packaging artwork. As the height is adjustable, I can also use it as a platform for tabletop photography. It can be moved around the studio and stored in a vertical position to minimize its footprint. Here are some photos of it:
Folding Table Top:
I use a 3 x 6 foot folding table top propped up on a saw horse as a mobile flat surface for drying paintings and prints and as somewhere to place reference notes, drawings, supplies and other items used for creating artwork or for photographing. When not needed, and to free up floor space and clutter, I store it folded either horizontally on its edge on the floor leaning against a wall or upright against a wall or in a corner somewhere.
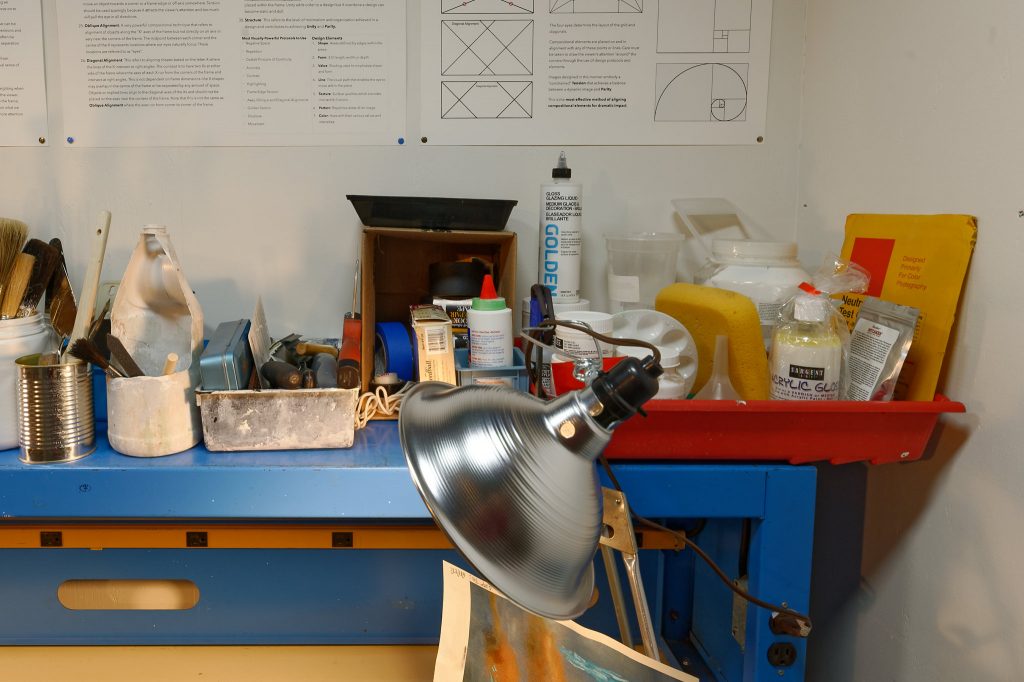
Painting Counter:
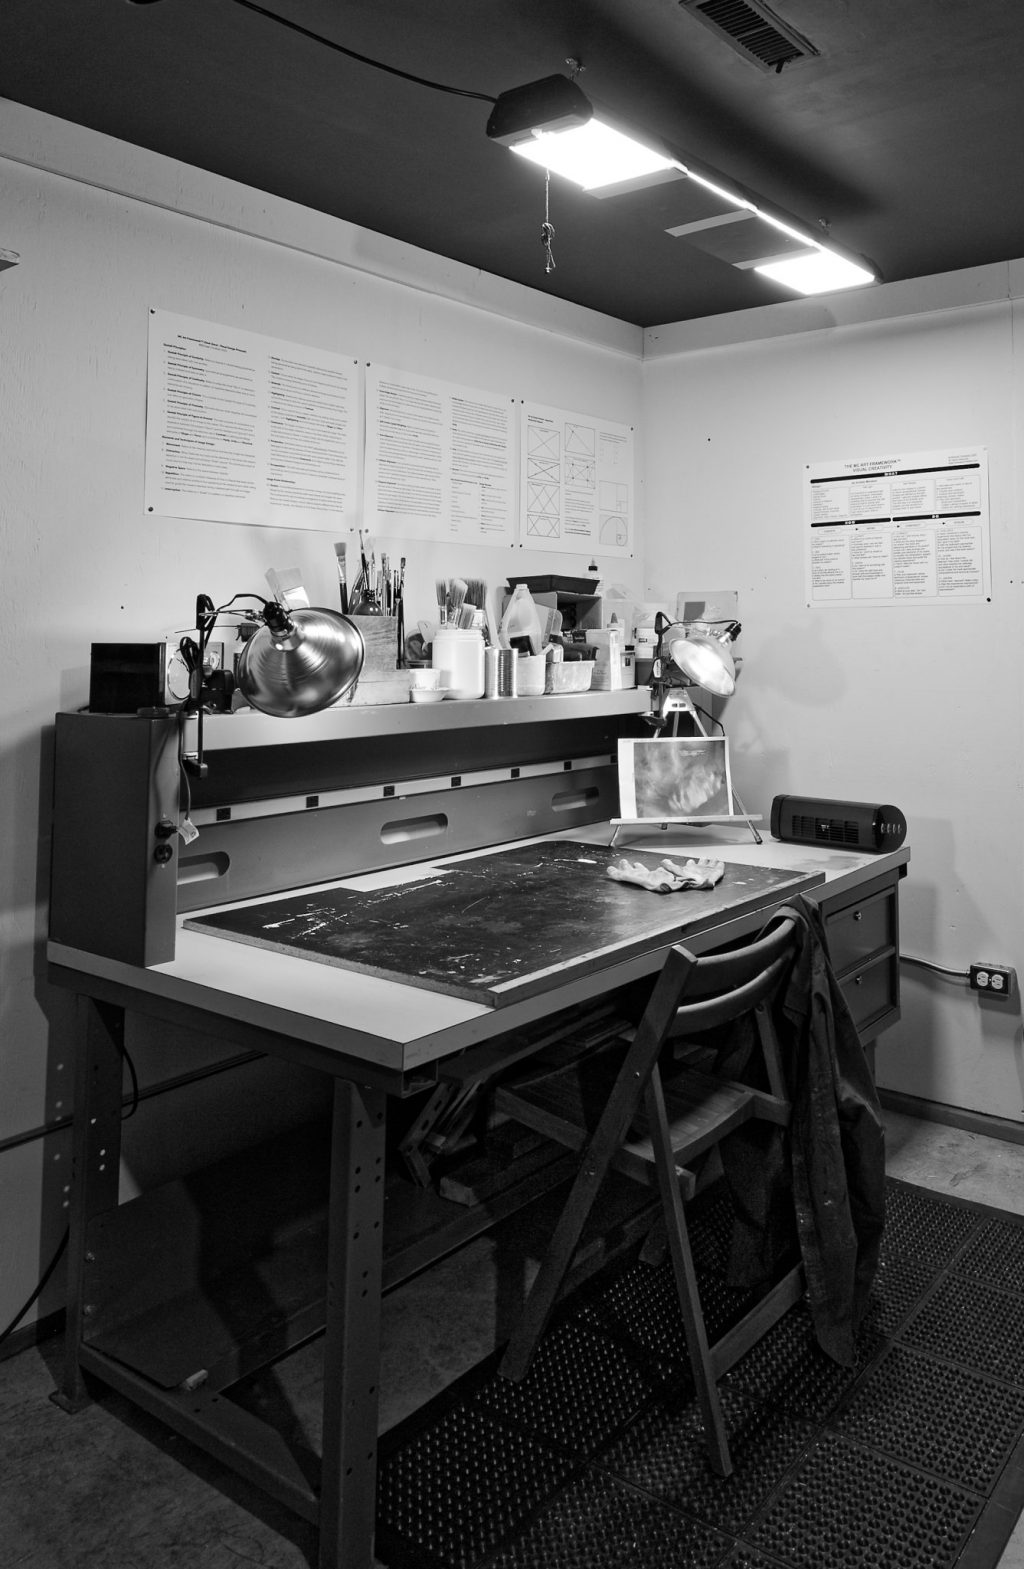
I have an old electronics bench that I use to paint horizontally or on a slight angle. It provides a large 3 x 5 foot surface to work on. The height of the working surface is only 30” above floor level (this is 6” lower than typical counter height) allowing me to more easily lean over while working on a painting without having to shift it around. It has a shelf above the working surface that runs the length of the back of the countertop. It is sturdy and all-metal construction with the exception of the countertop and has numerous 120v outlets for plugging things in.

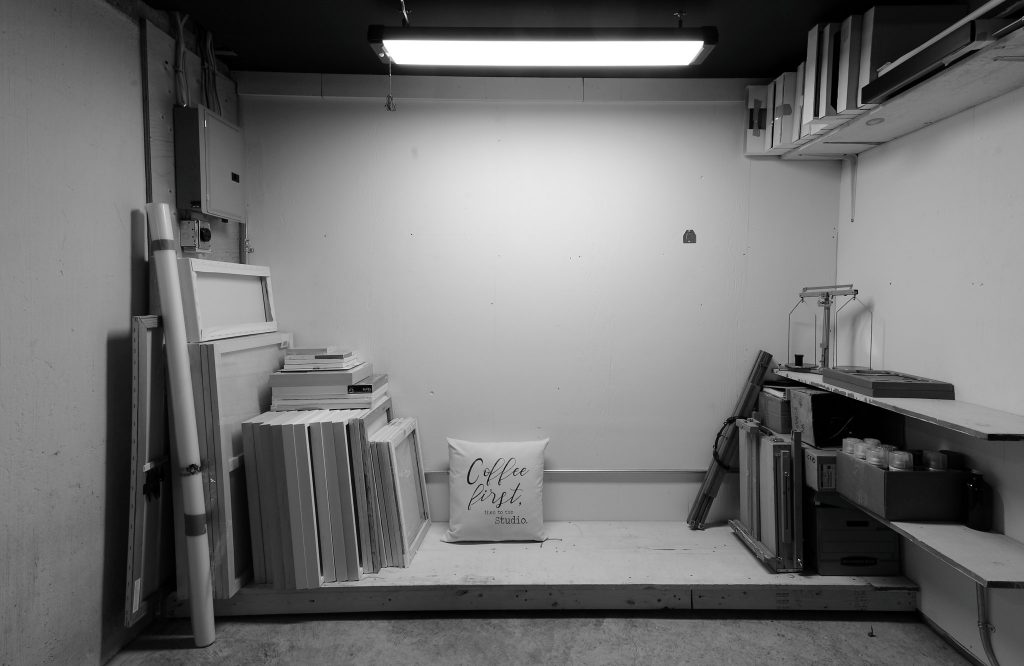
Below is a diagram of stationary studio furniture. The raised platform (green) is 6” off the floor and provides an area to temporarily store painting panels and whatever else I want to put on there that I want off the floor. I sometimes sit on it for a break or to check my phone or whatever. I also have an old wooden folding chair, two office chairs and a pillow for sitting.
I designed the layout of the studio to have free wall space on two walls for painting and photography. Here is a diagram of all of the various available workspace configurations. Note that, with the exception of the painting bench (red) and storage unit (grey), everything else can be moved around and stored out of the way either in or out of the studio itself.
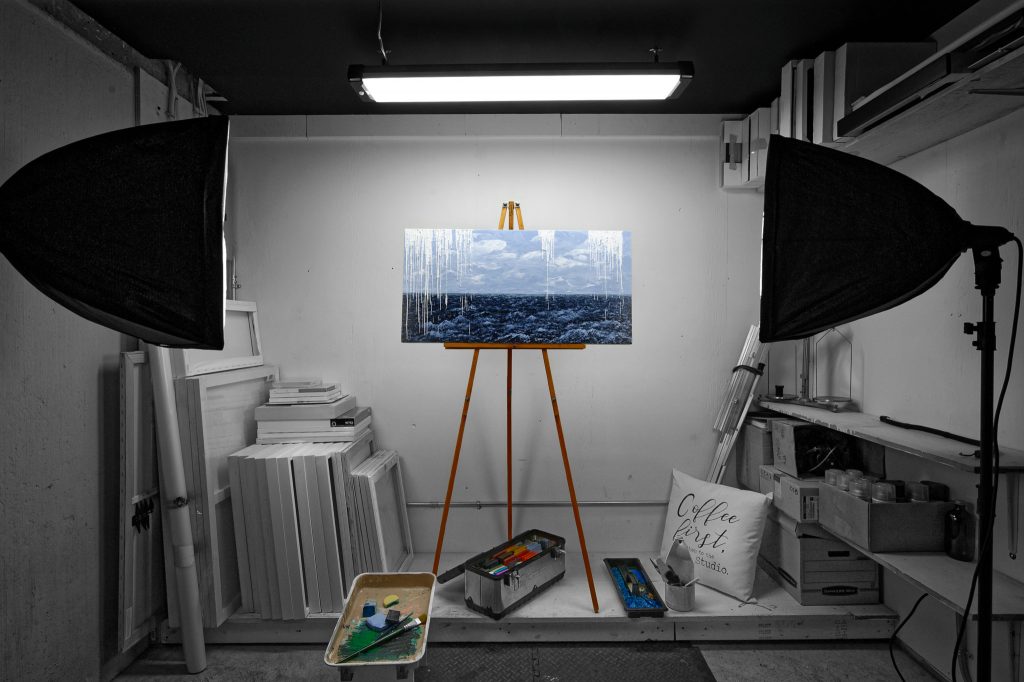
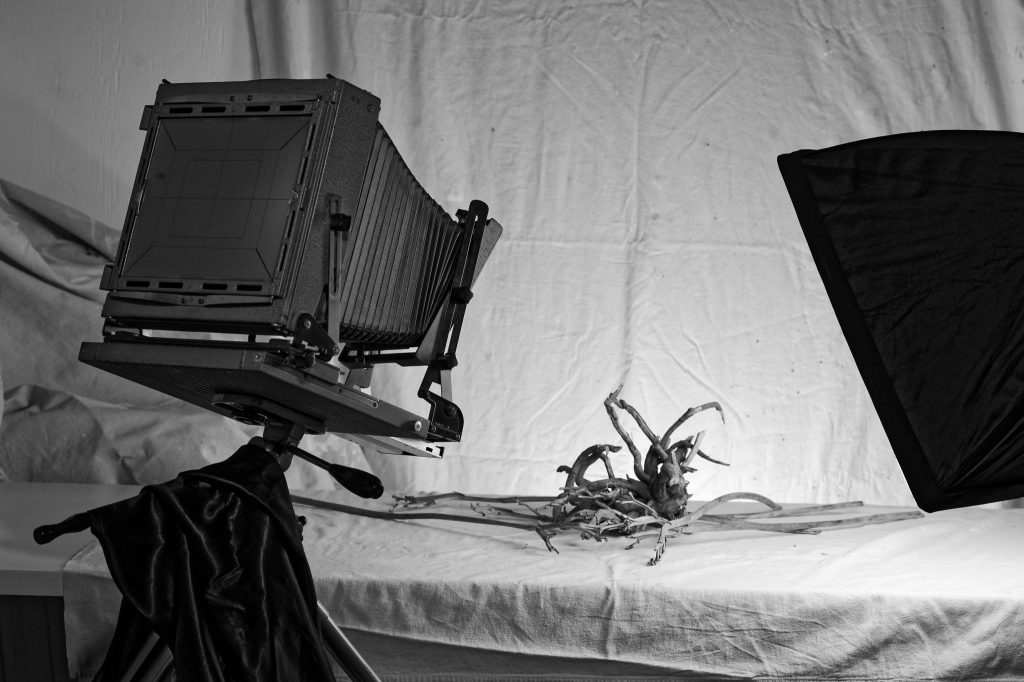
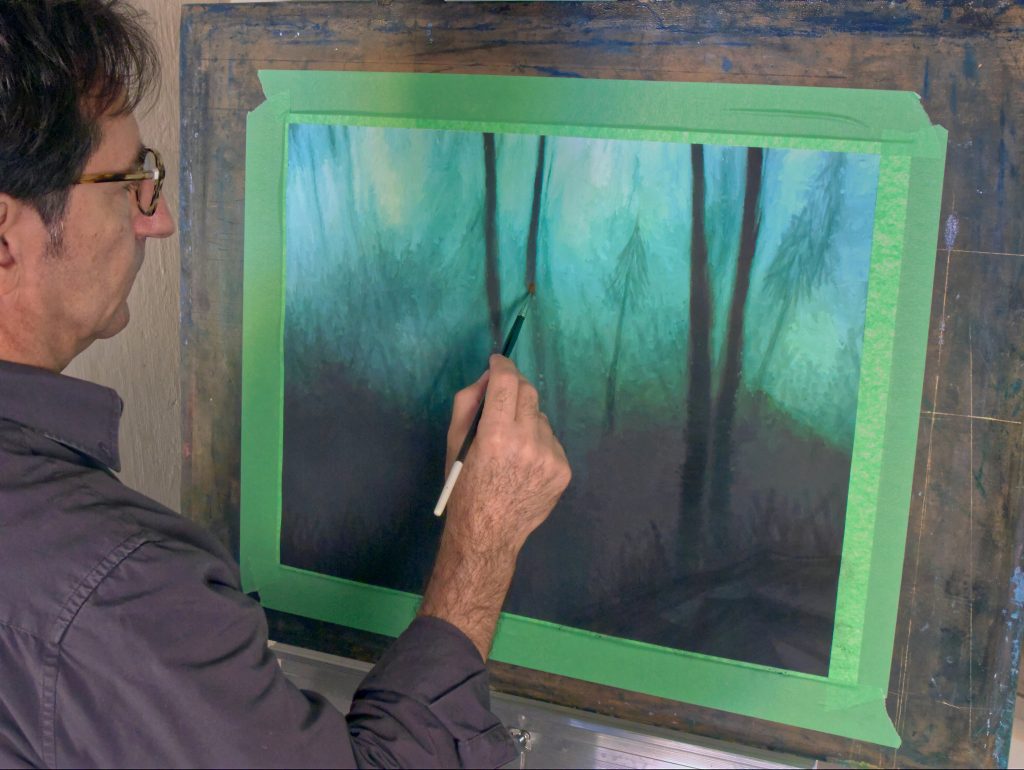
Easel painting setup with studio lighting:
Painting in the studio using my plein air easel. Sometimes, I’ve used my iPad on it for digital painting (using a stylus and special digital brushes). I know, there’s something not quite right here…
Getting ready to work on a wall…
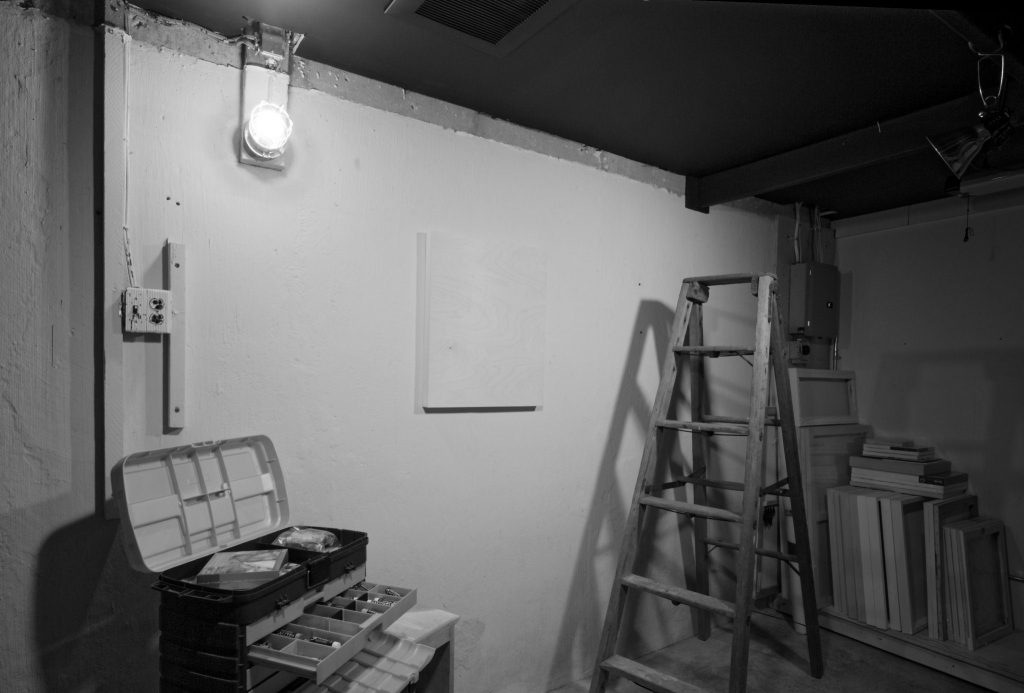
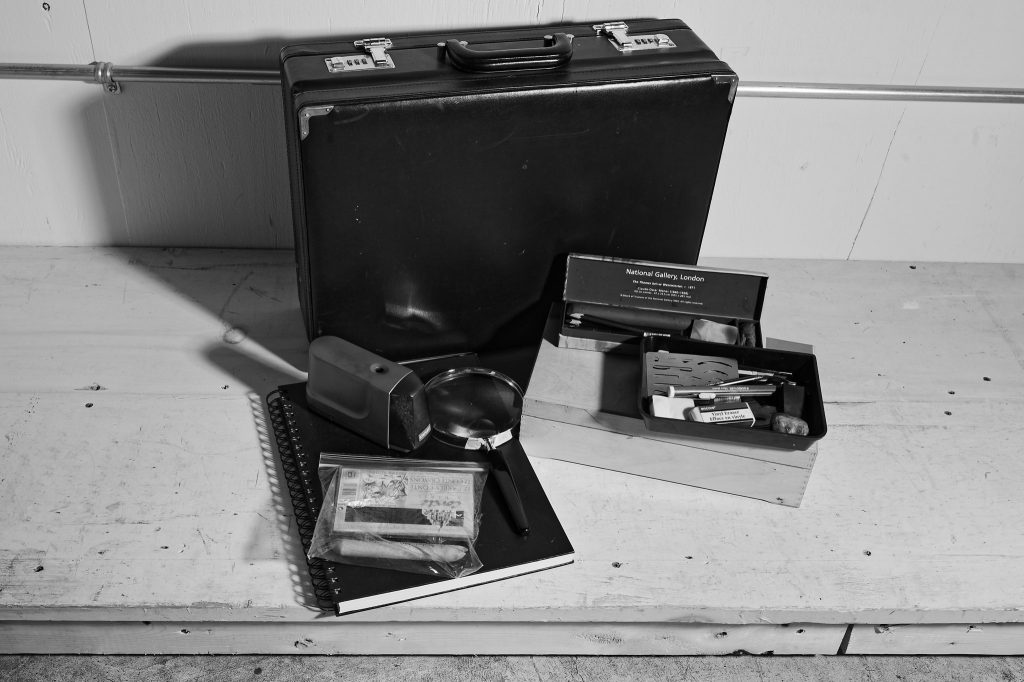
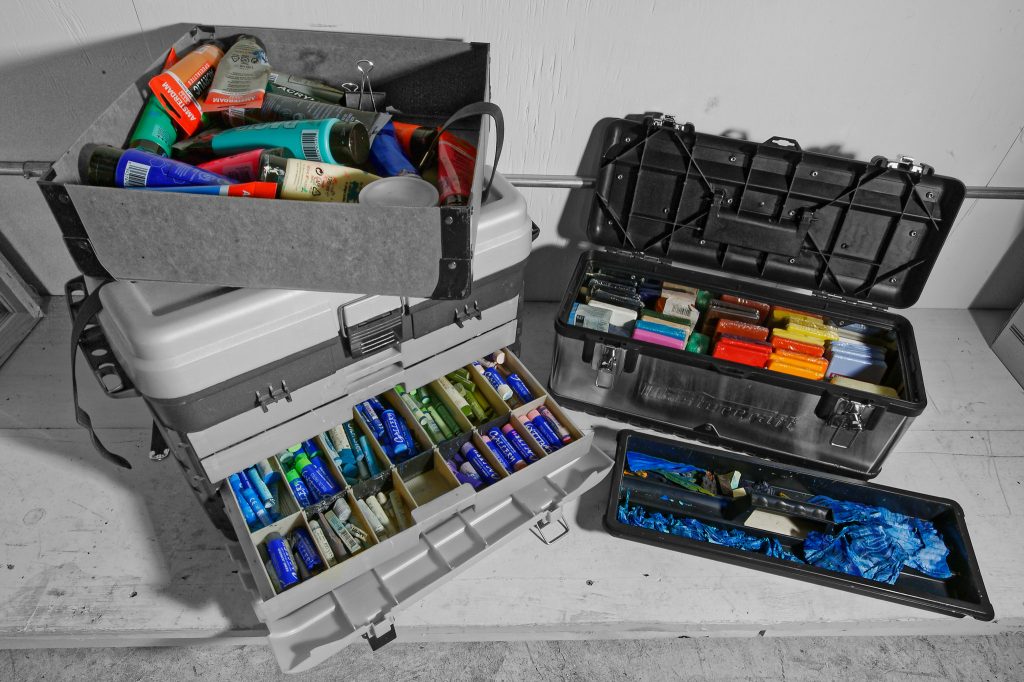
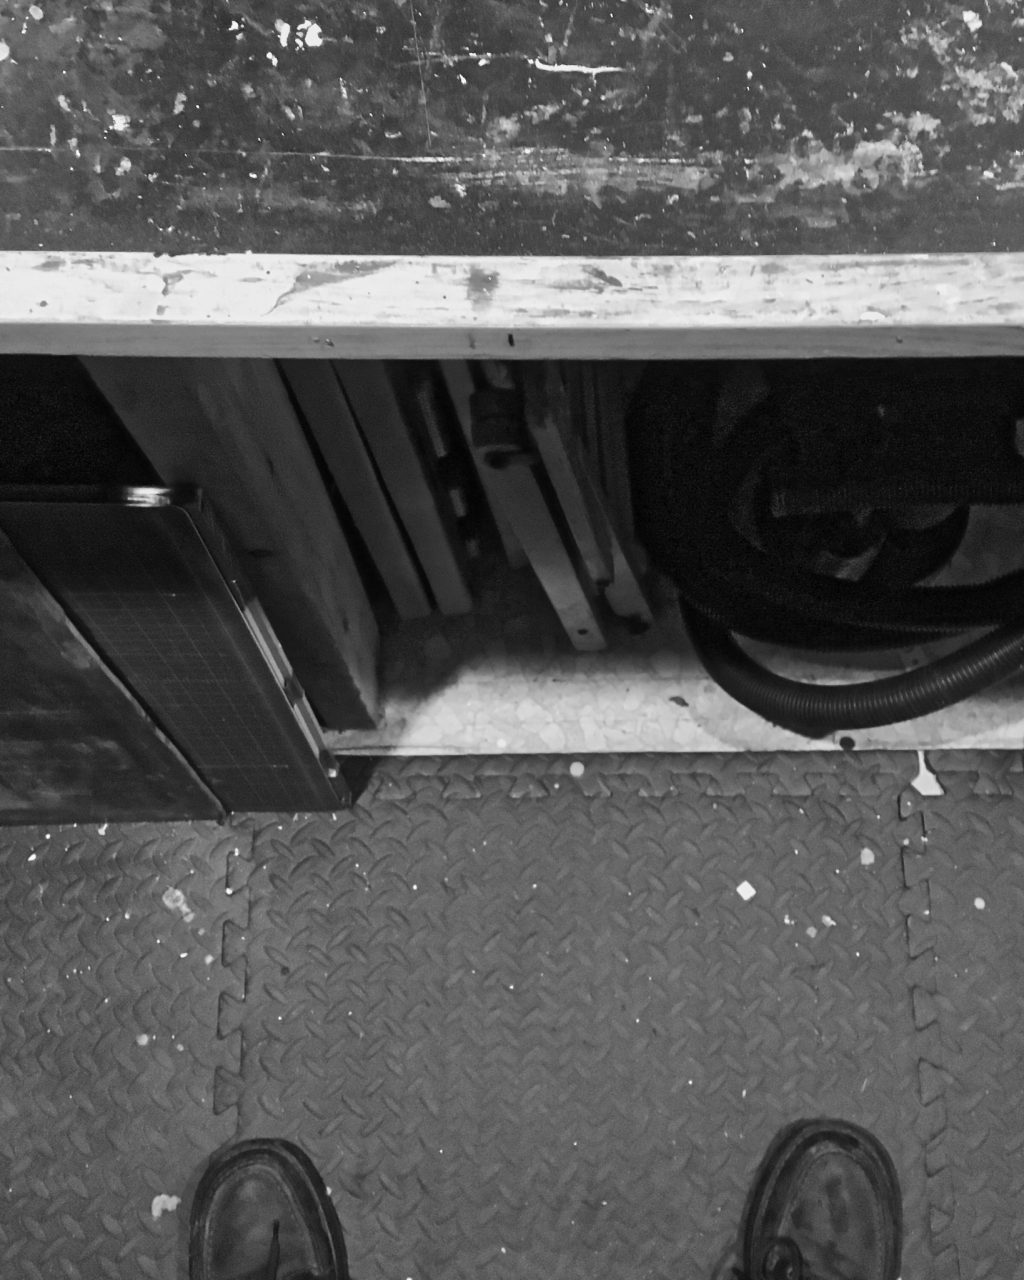
Storage:
Though I have a separate storage room and office space, I wanted to store some supplies in the studio to have them close. I took advantage of vertical space for storage to leave as much open floor space and floor-to-ceiling wall space as possible.
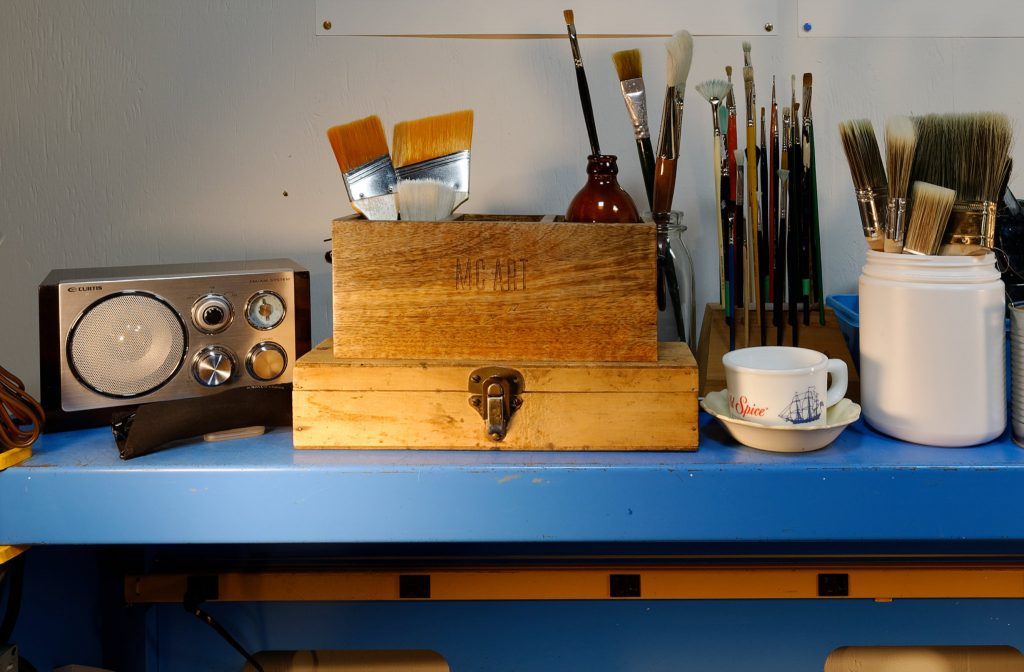
I use containers, boxes and cases to keep a variety of materials and various bits and pieces and store these, along with some smaller paintings, on studio shelves.

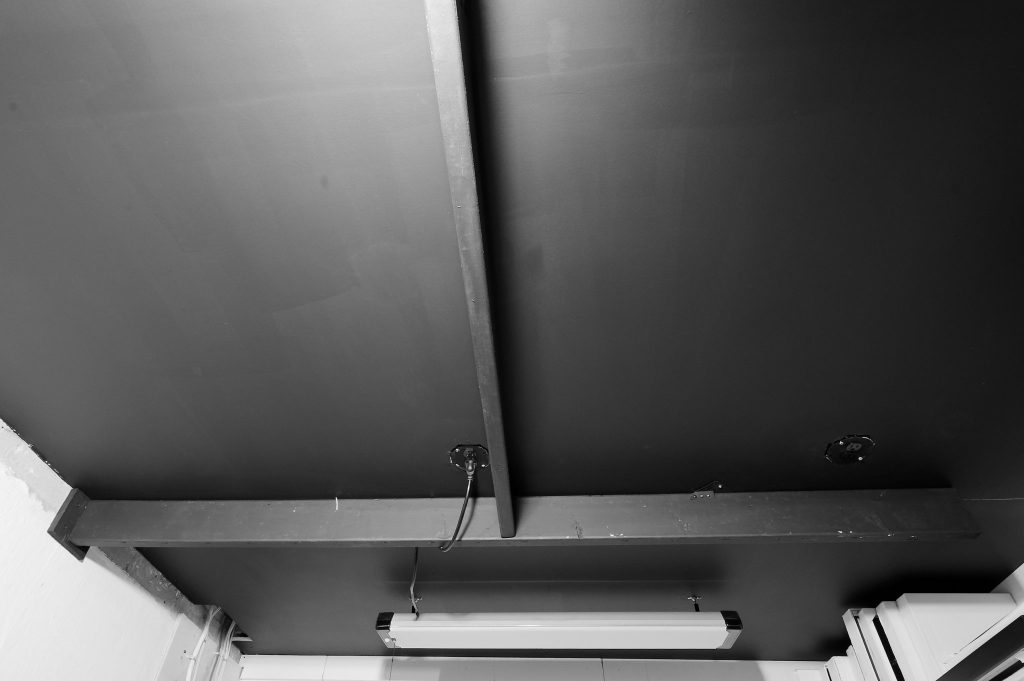
A good space-saving hack is that I can use my lighting “rails” on the ceiling (discussed further down) to suspend wire from for hanging wet drawings or paintings if I run out of horizontal drying space.
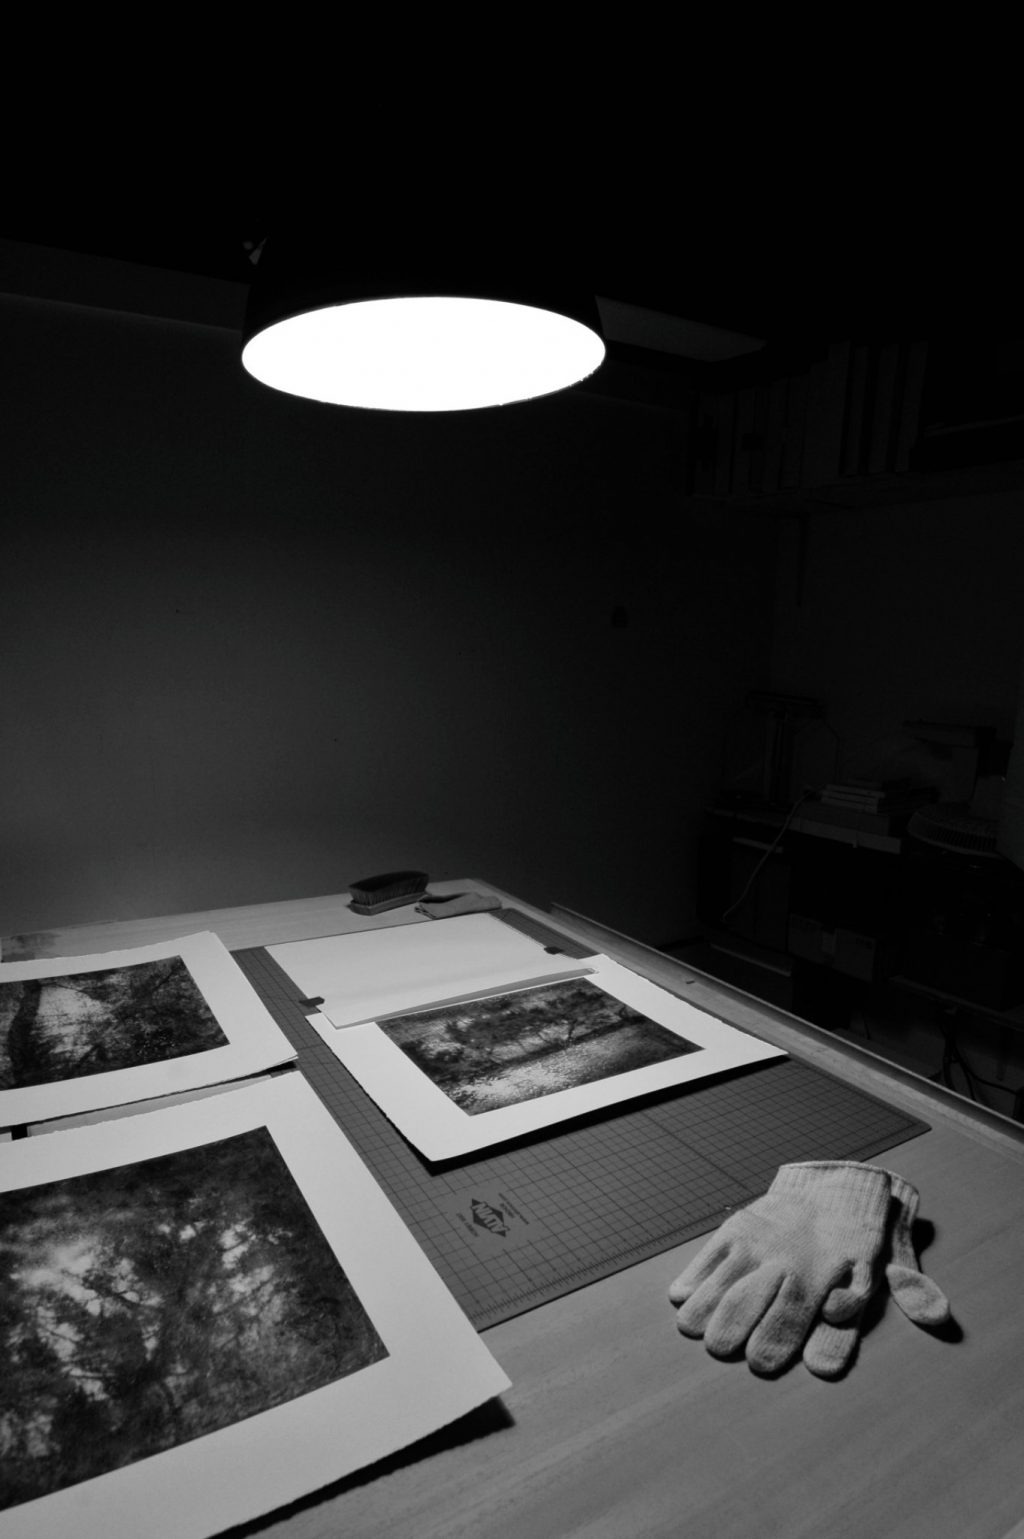
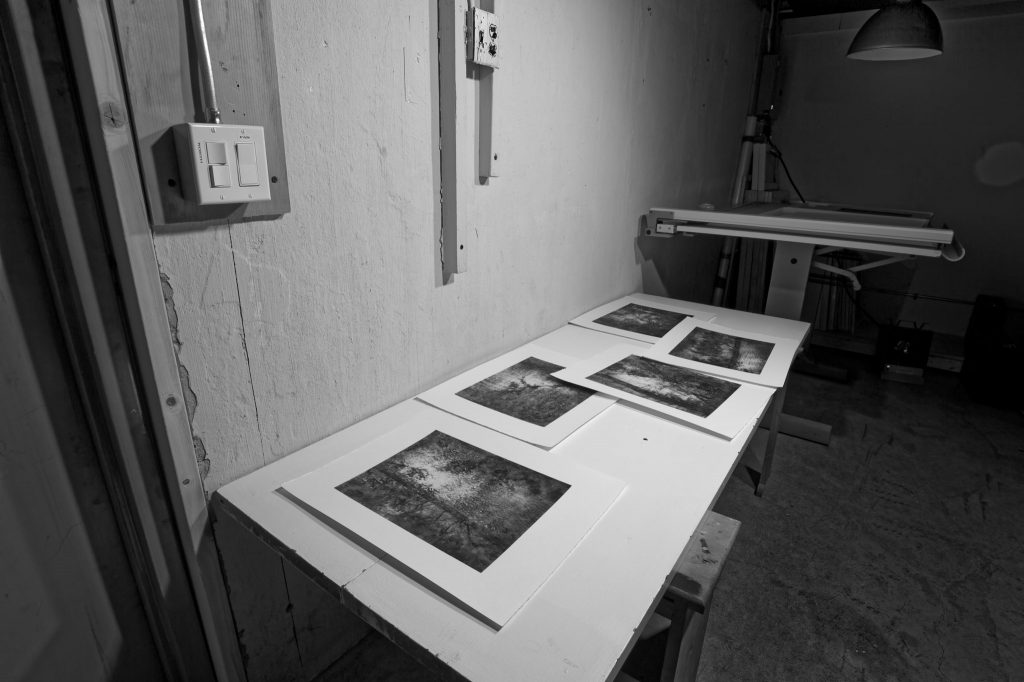
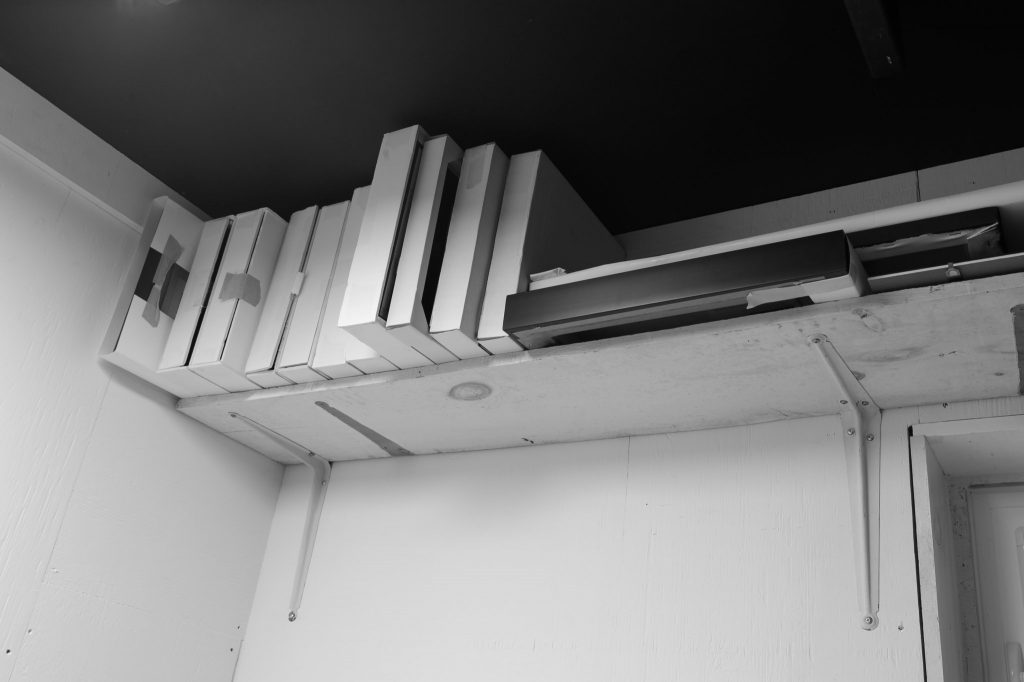
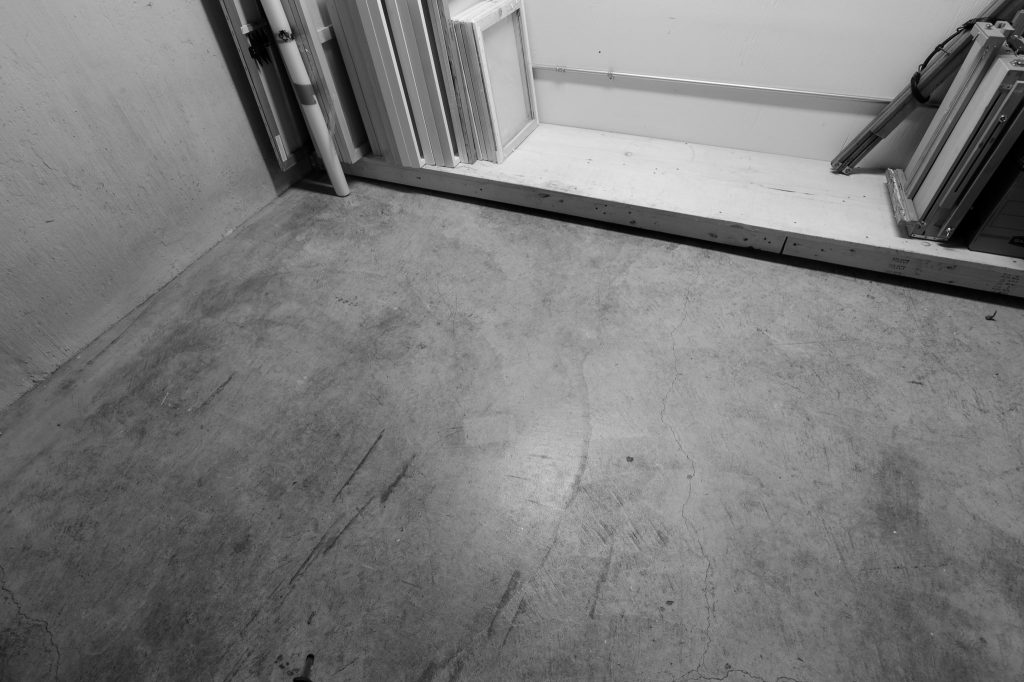
I built a shallow shelving unit to store paper supplies, paper works and paintings horizontally stacked as they dry. This is a space-saving way of getting them out of the way and shielding them from possible damage until they are dry and can be moved out of the studio.
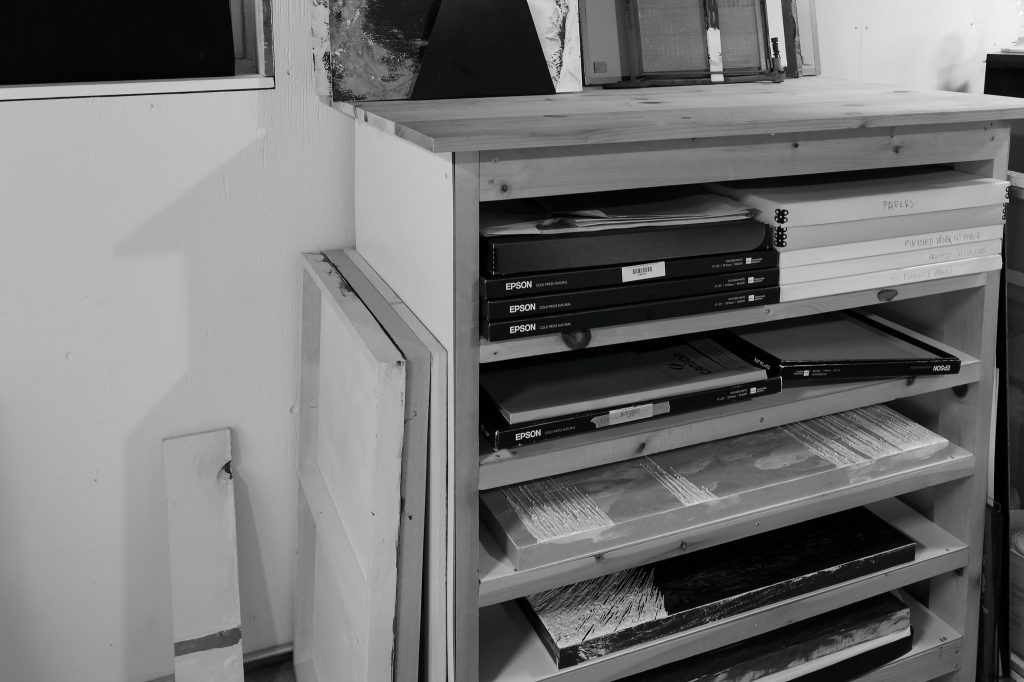
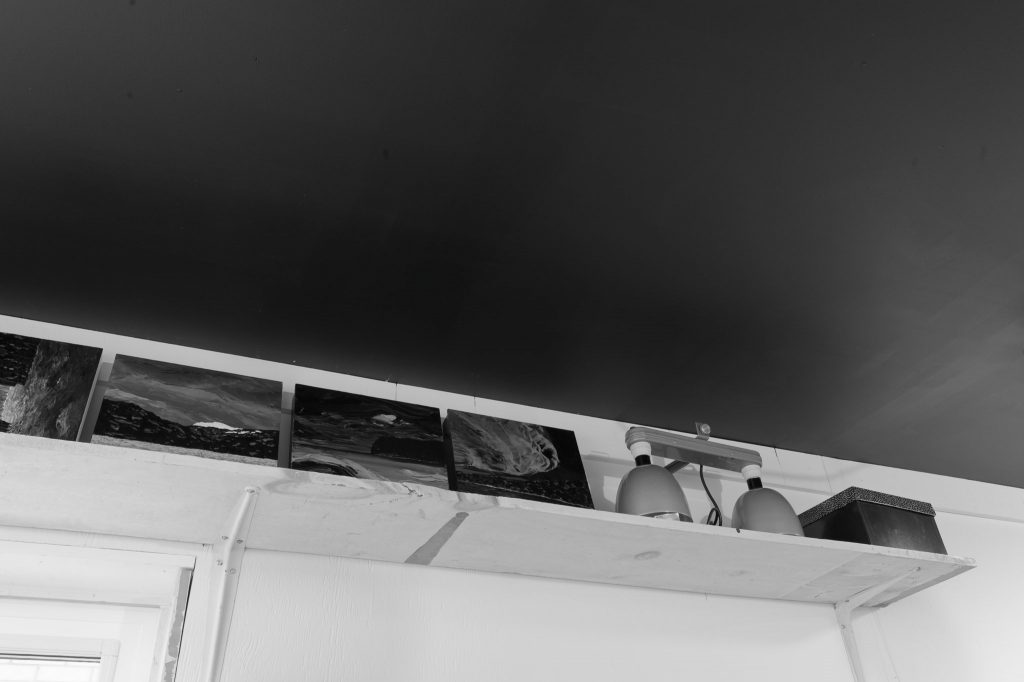
Here is what is currently sitting on the shelf over my bench:
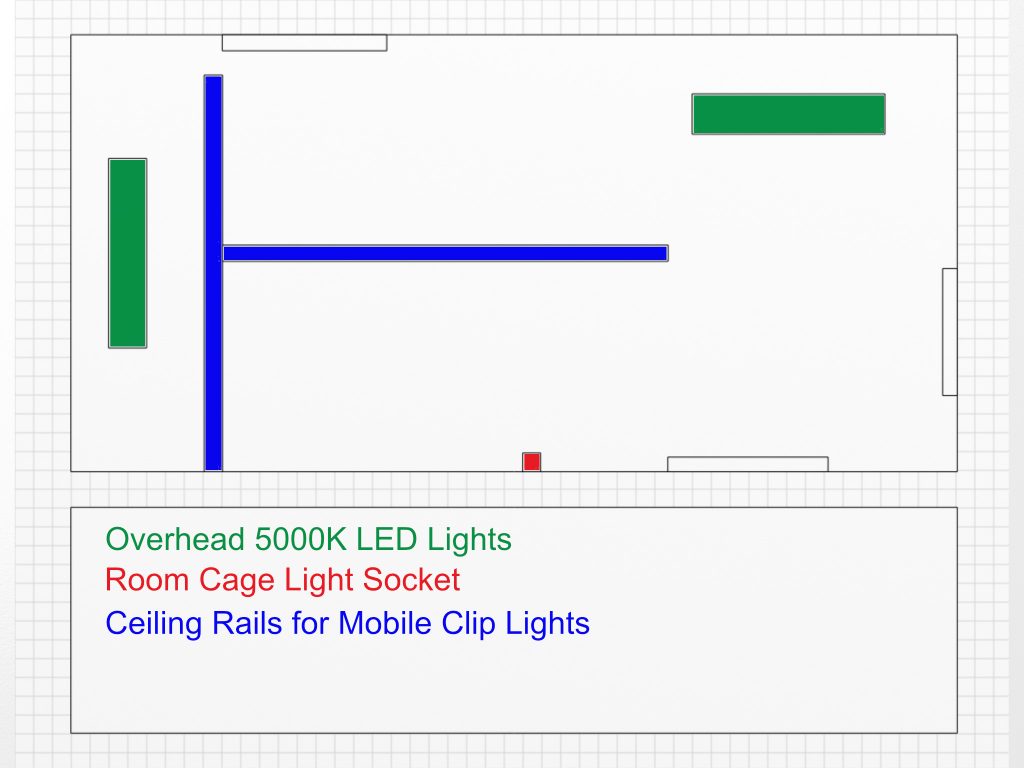
Lighting:
The studio walls are painted a neutral white. The ceiling is black to provide control over lighting because I don’t want light bouncing around everywhere and want to precisely control the light I paint with and photograph under.
Artificial Light
There is a single light bulb in a cage mounted near the ceiling to provide some illumination once you enter the room at night.
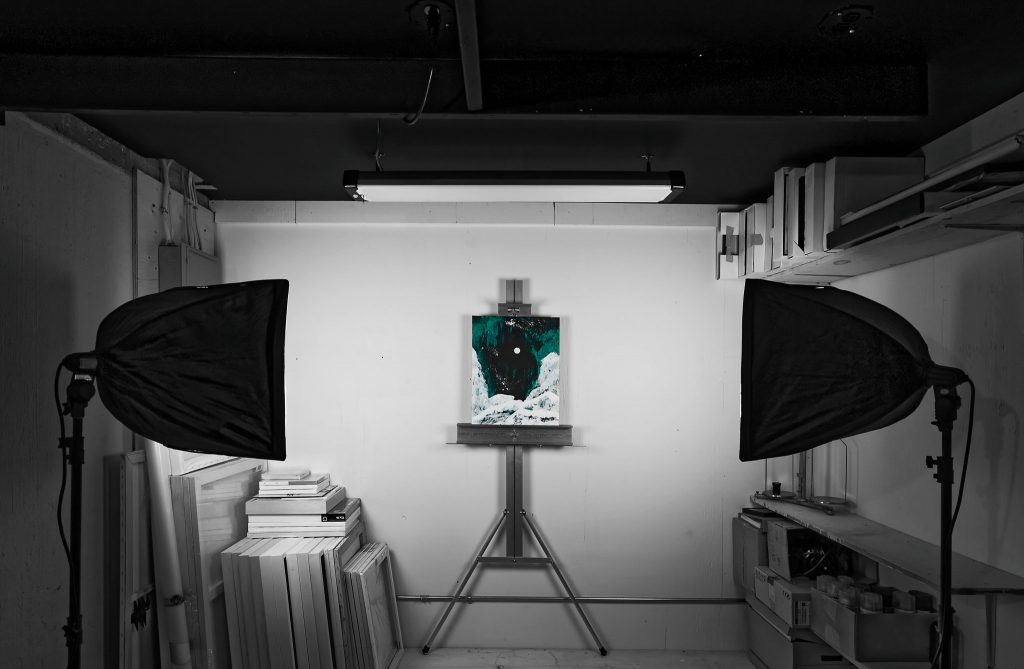
I have two daylight balanced (5100 Kelvin) CFL (compact fluorescent lamp, 85 watt) soft boxes. These are five-sided foldable black cloth enclosures with one translucent white side and highly reflective interior surfaces used to provide soft illumination and maximum light output.
They are on mobile light stands, and I use them for photographing artwork, studio photography, for painting (easel, wall, floor) and for viewing/displaying finished works in the studio.
** If you are finding this article interesting, subscribe to receive information about my work and creative process, and also get access to my free ebook about becoming more creative.
![]()
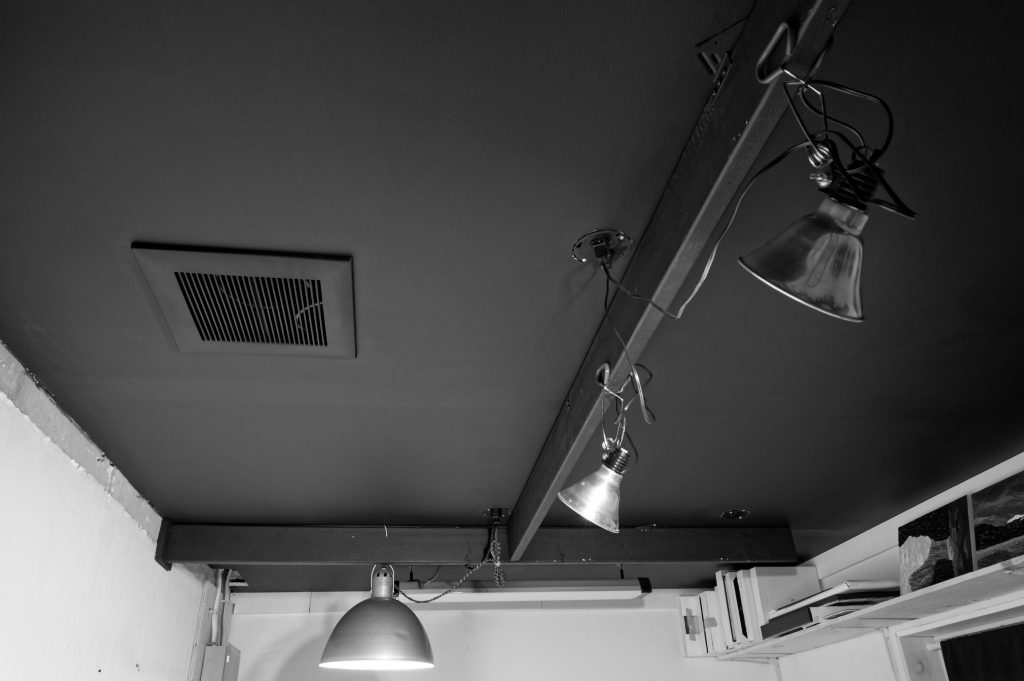
I have four clip lights that I use with 3200 or 5000 Kelvin LED bulbs. These can be located around the studio as light sources and provide mixed lighting illumination (using light sources of differing temperatures) when painting or for photography.
I also have a beautiful vintage metal single socket parabolic light enclosure that hangs suspended from the ceiling and can be moved around the studio. It is usually paired with my drafting table. Great light to work under…even and soft illumination that is easy on the eyes.
I have two daylight balanced (5000 Kelvin) LED ceiling mounted shop lights. One is over my painting bench and the other is at the other end of the studio. My painting bench shop light is masked off in the centre to reduce brightness and reflections. Its light is balanced with two 3200 Kelvin LED clip lights. This is necessary as the temperature of light impacts how colours are perceived. This is why I generally paint under mixed lighting conditions…to mimic lighting in people’s homes. The clip lights need to be elevated above the painting surface and located off to each side to prevent their light from reflecting in the painting. They also need to be far enough from the painting so as not to create hotspots on the canvas and to provide fairly even light when combined with the overhead daylight balanced lighting.
The setup I am using with the clip lights is adequate though not ideal. The clip lights should be located higher and further away for more even illumination. This would require a different lighting setup with more wattage, and I would have to relocate my bench away from the wall on the right (see pic below). For now, I am cognizant of, and can work around, any issues. Since I am working horizontally to a maximum size of 24 x 36 inches, I can move my canvas around as necessary to compensate for any partial reflections or lighting temperature variations.
Natural Light
What’s the big deal with north light (south light if you’re south of the equator)?
The idea is to never get direct sunlight coming into the studio so that the lighting remains relatively consistent throughout the day. Direct sunlight is very harsh light to paint under—it creates strong highlights (wet paint reflects light sources) on the canvas surface and makes it virtually impossible to accurately judge the true relative value (brightness) of colours. This is similar to the sensation of “snow blindness” after having your picture taken with a bright flash. Painting under these conditions often results in overly harsh, dark paintings. Plein air (painting out of doors with natural light) painters can experience this when not painting in the shade. This is why they often use shields to keep the sun off their canvas. “North” light is very soft and bounces around surfaces to provide even illumination. It was the only viable practical option for studio painters until electricity was invented.
There is a north facing window in my studio. I am also fortunate that there is a light grey bricked building outside the window so that there is absolutely no view whatsoever! This is actually a good thing. My window faces north, and the building faces south. This means that it catches south light (bright sunlight) and reflects it into the studio as bright soft light!

It provides soft light throughout the day. I find it a pleasant experience to work in natural light. I often temporarily draw a blackout drape over the window as necessary to judge colours under controlled studio lighting ensuring that I haven’t strayed too far in terms of colour, intensity and overall values (relative brightness of various areas).
When I paint with natural light in the studio, I also prefer to have a reflector opposite the window to reflect back some of the light into the shadow areas caused by my arm and brush blocking the light falling on the canvas. This helps when painting smaller details. In the picture below, you can see that the reflector is illuminating the left (non-window facing) side.
Electrical Requirements:
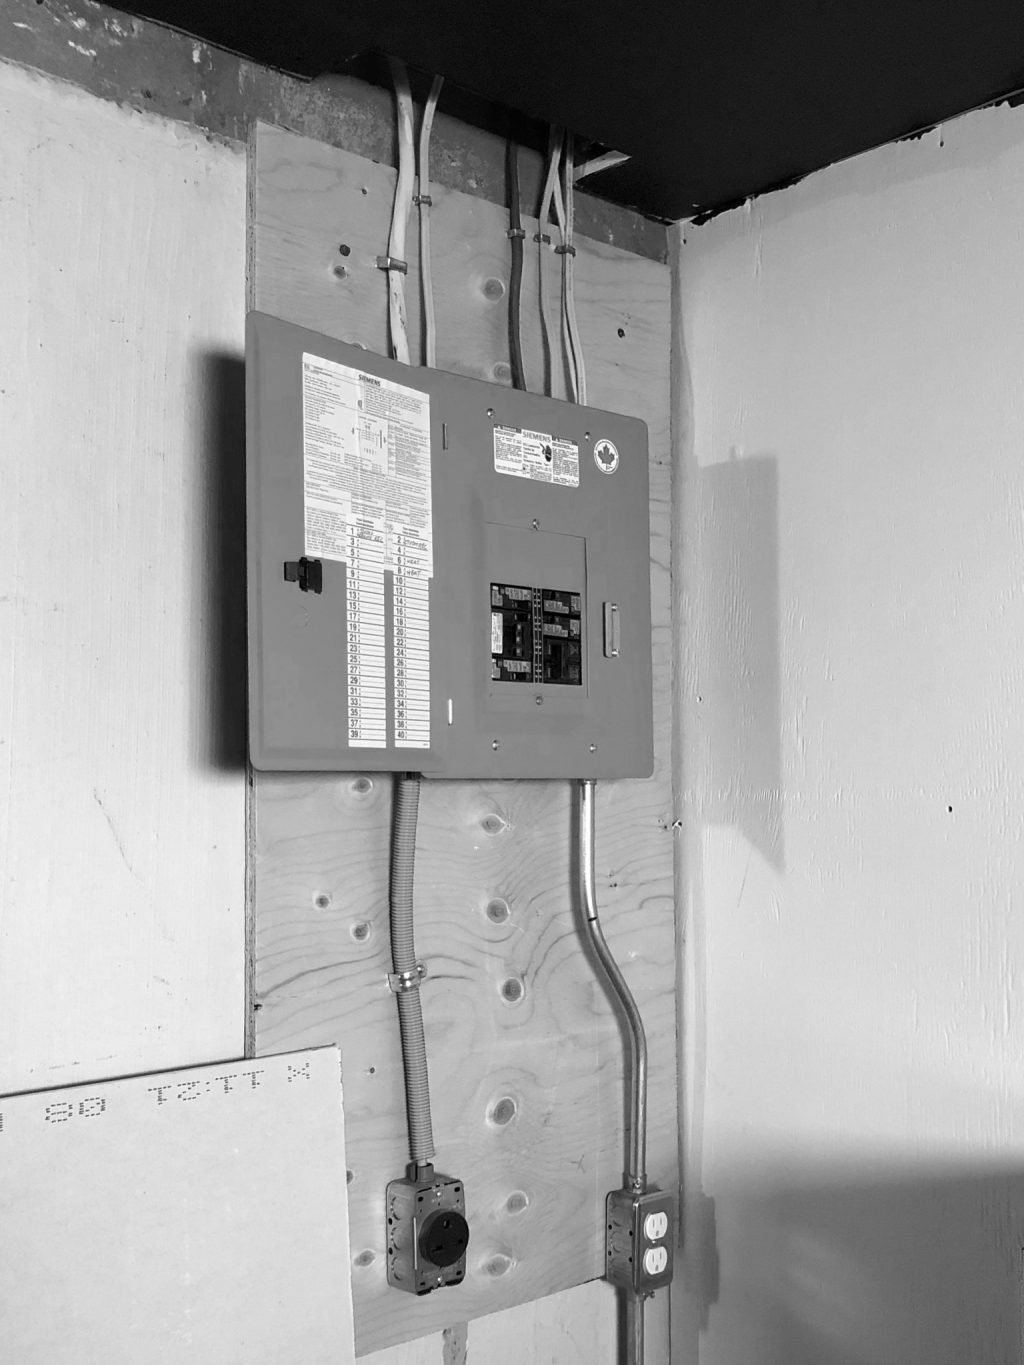
Here is a diagram followed by some photos of the electrical layout:
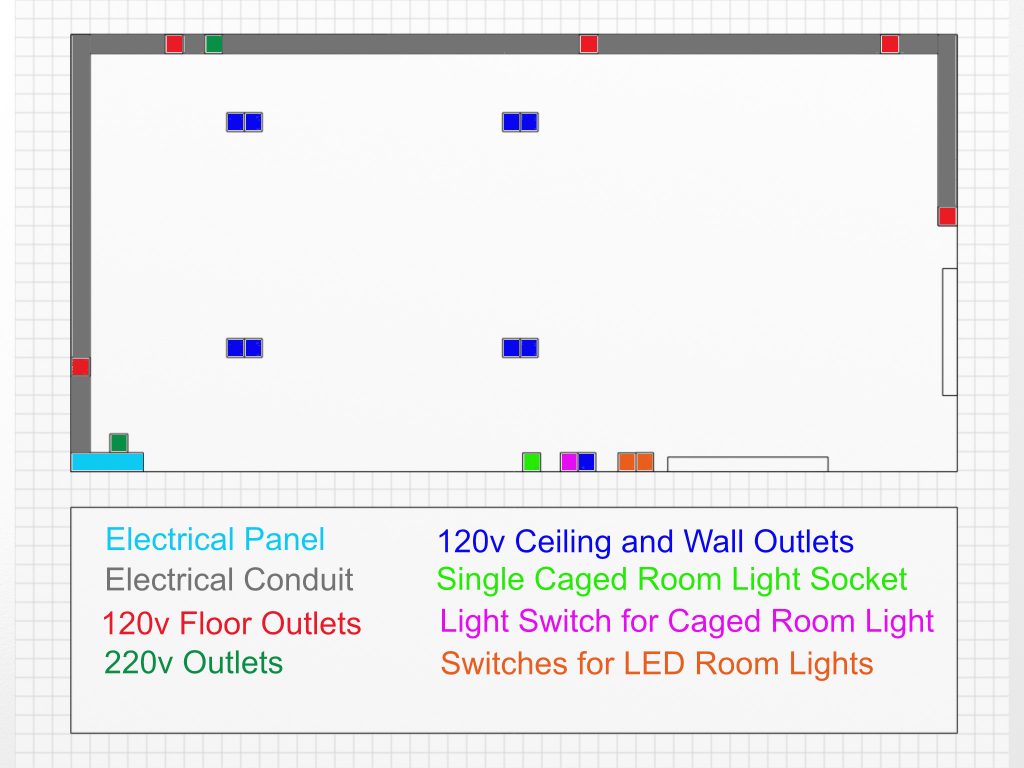
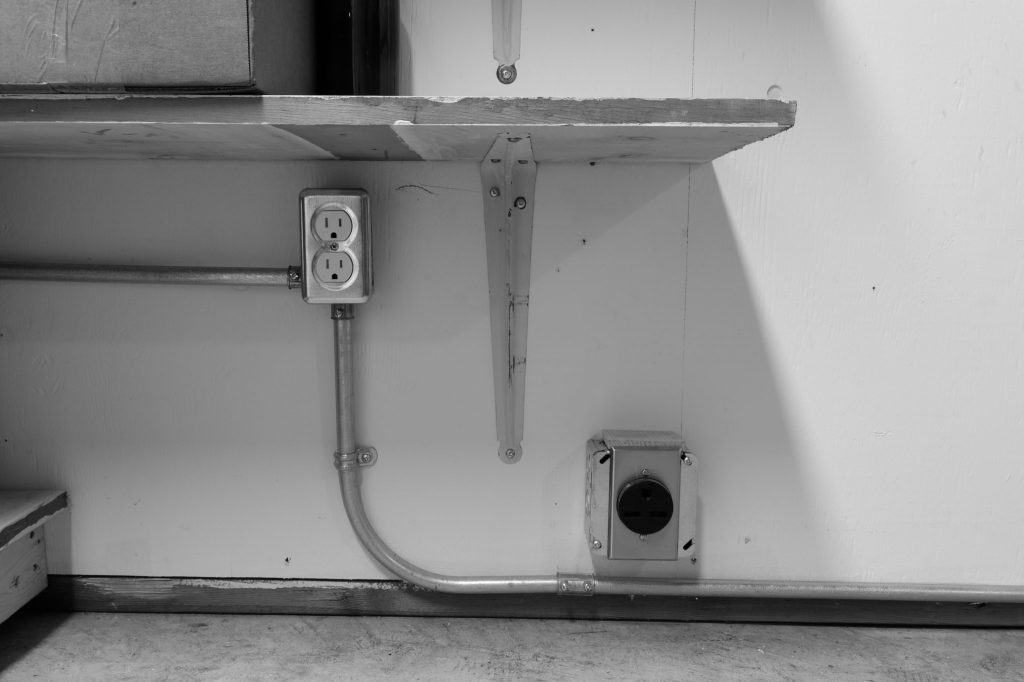
Electrical panel, 220v and 120v outlets:
Floor outlets:
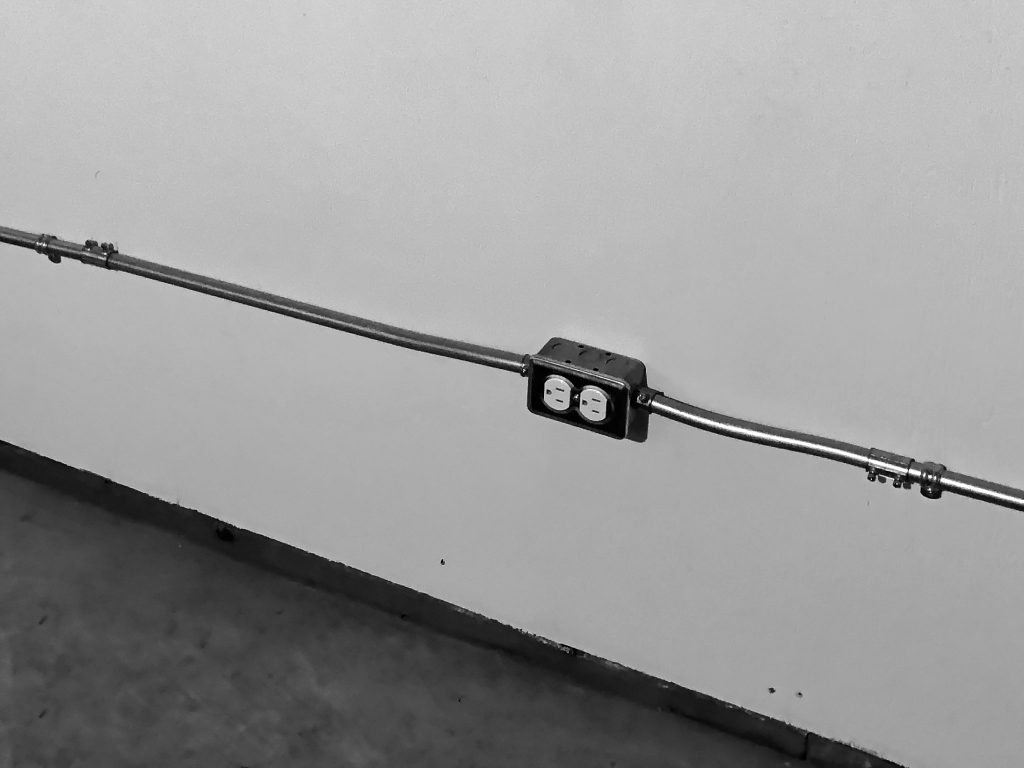
Ceiling fixtures (for plugging in clip lights and shop lights):

HVAC:
Here is the heating, ventilation and air conditioning layout of the studio:
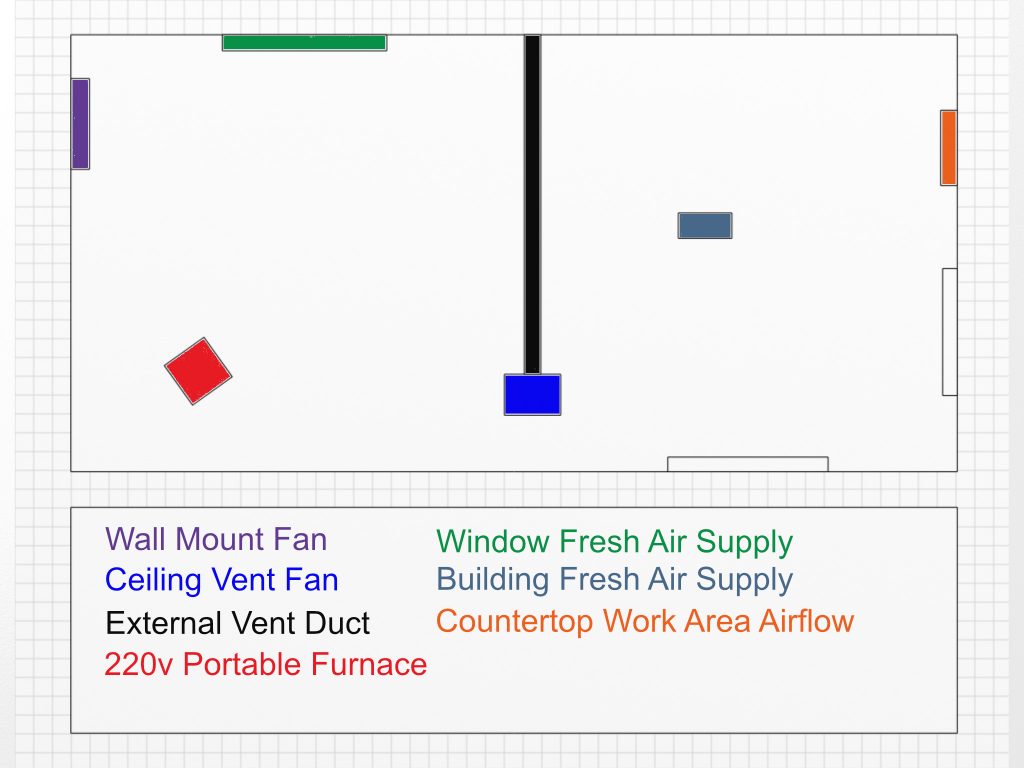
Ventilation is essential for using paints, fixatives or any chemicals in a confined space.
Hazardous fine powder dust created from using soft pastels, charcoal and working with dry pigments is a concern for artists. These need to be vented out of the air and any residue left behind cleaned up. When using soft pastels, I use steam to adhere/bind the pastel pigment to the paper. This not only lets me build up more layers of paint but also reduces the amount of dust released into the air and dust that drops down to the floor as I’m working.
Successfully venting air out of a space requires that air pressure in a room be equalized via a fresh air supply intake. This can be accommodated via a building’s central air circulation system or open windows (generally not the best year round solution due to environmental temperature fluctuations).
My studio window opens to provide an outside fresh air supply, and there is also building ductwork that provides building air.
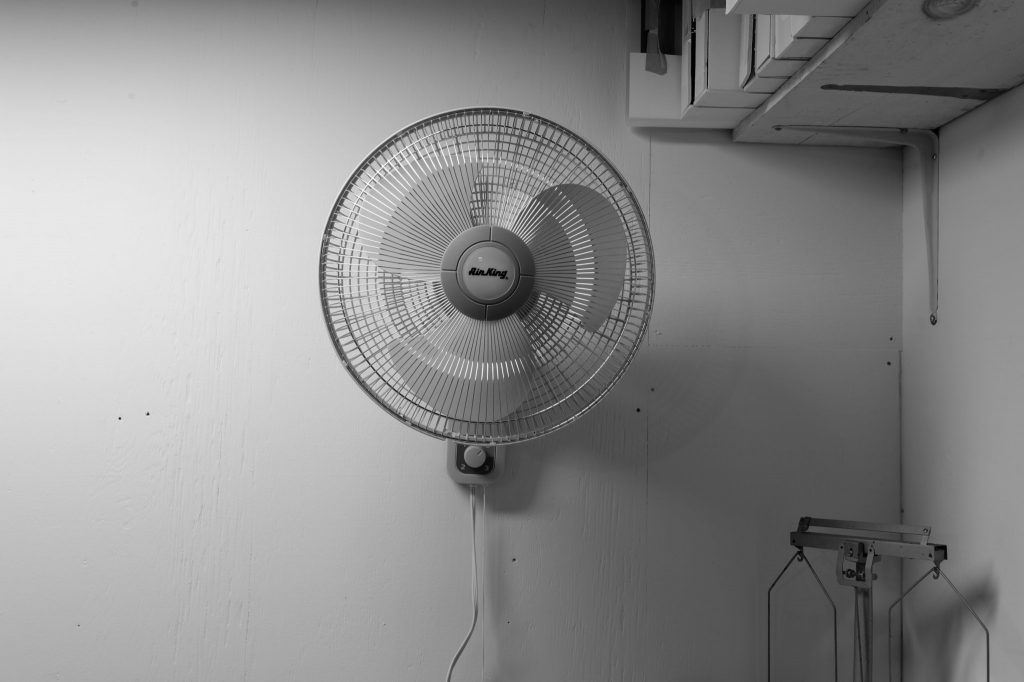
I also have a wall mount rotating fan located just to the side of the window. This fan creates airflow across the front of the window to push a stream of fresh air towards the other end of the studio where my painting bench is:
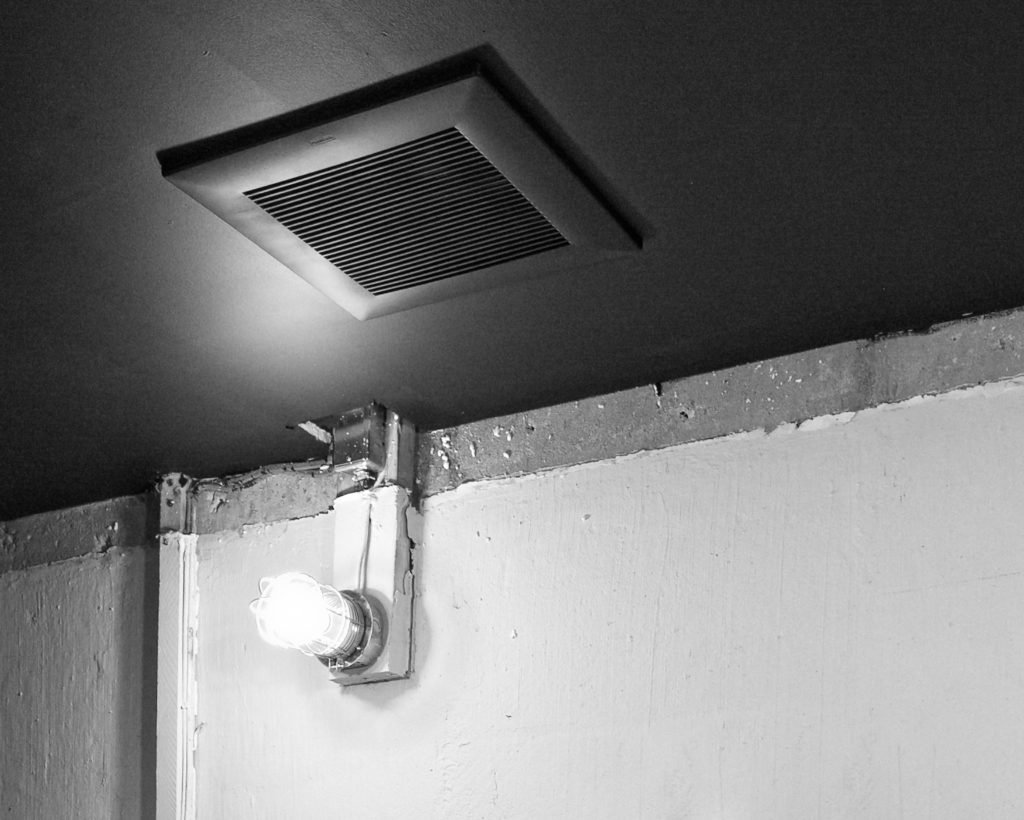
There is a ventilation fan in the ceiling that is vented to the outside to extract fumes. It also creates negative air pressure in the room to bring clean building and/or outside air into the space:
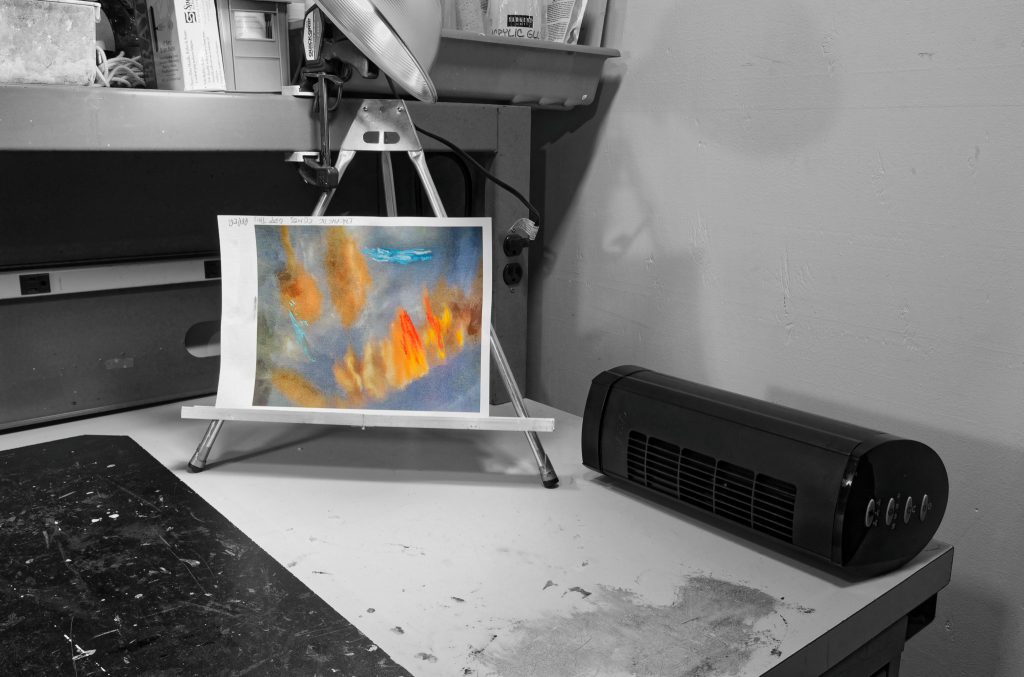
I also use a portable 220v furnace for supplemental heat as required. It has a blower fan and can heat up the studio quite quickly and maintain a good working temperature even when I have my window slightly open in winter to let in more fresh air. It can plug into either of the two 220v outlets.
When I’m working on my bench, I have a tabletop fan that creates an airflow across the surface of my painting at counter level effectively blowing any paint fumes away from my face as I am working to let the room vent fan expel them to the outside:
Health and Safety:
Here are the health and safety concerns that were addressed in the studio design:
The concrete floor is sealed to prevent concrete dust. This also provides for easy cleanup:
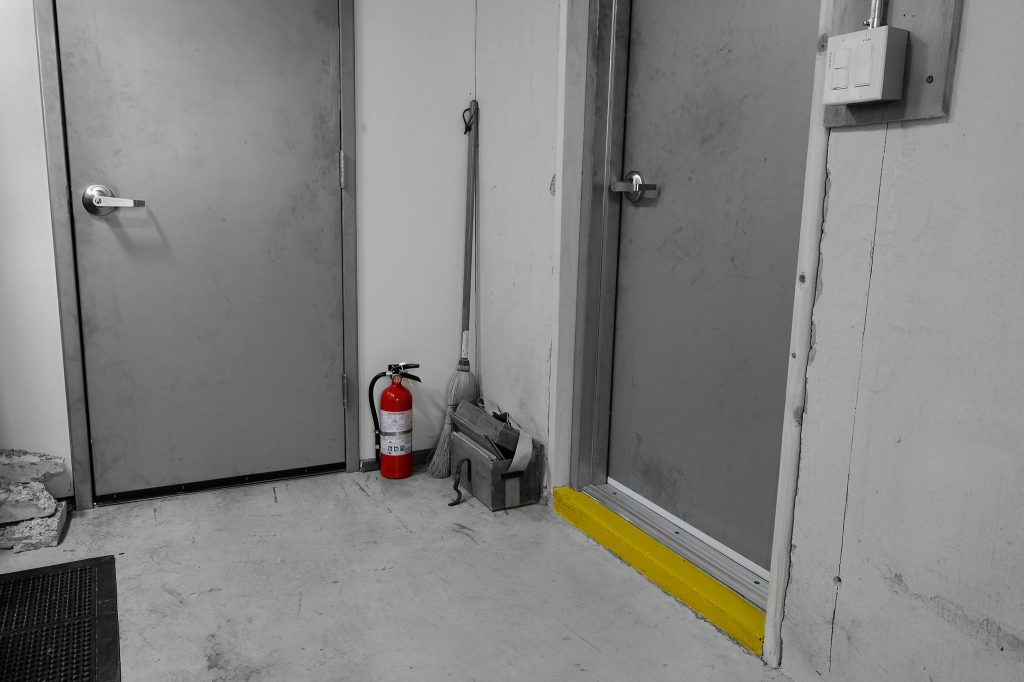
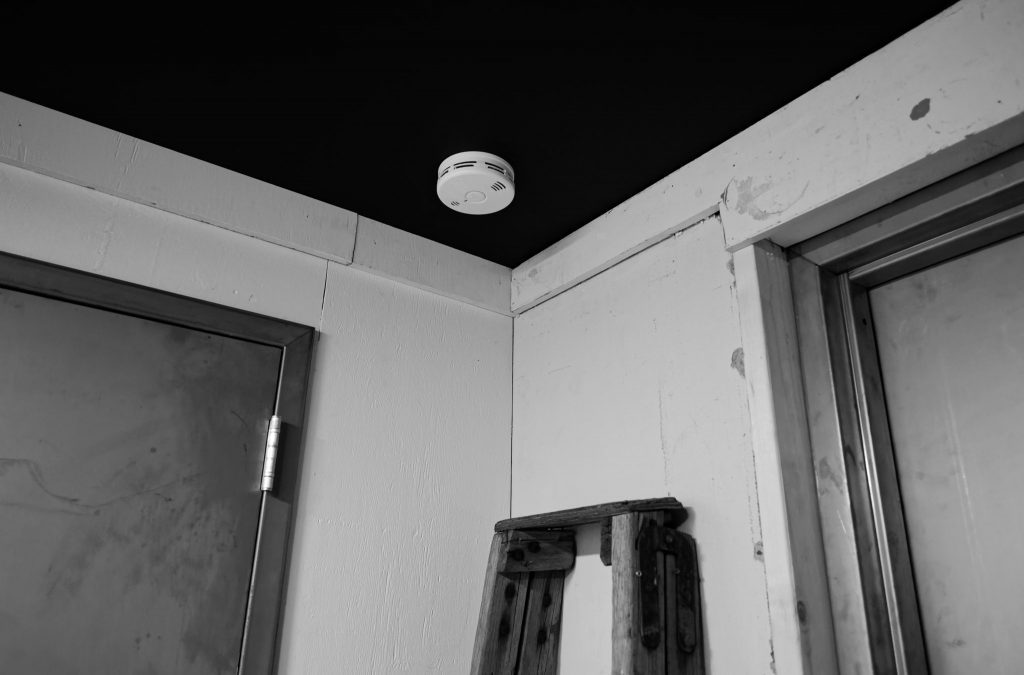
The studio is on ground level and is accessible. There are fire doors with quick release industrial security locks. I have a fire extinguisher, fire and CO2 detectors in the working studio space. There is a yellow painted door stoop that delineates a differentiation in concrete floor levels between the working studio space and the rest of the space.
The window is a source of fresh air and can serve as an emergency exit if needed. There is also building air ductwork (see HVAC diagram, building fresh air supply) that also provides fresh air.
I use anti-fatigue mats in the studio:
There are washroom and water facilities with a mirror, good lighting and a deep steel sink with an extendable faucet to direct flow and minimize splashing when cleaning up:

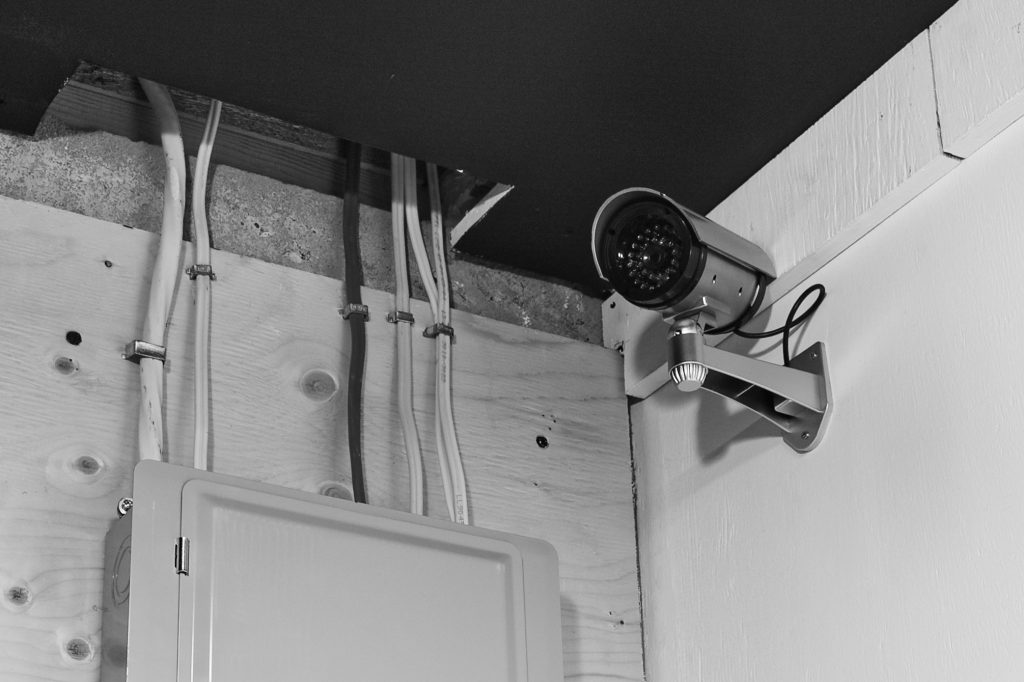
The studio has security surveillance and door alarms:
Well, there you have it—my studio! Loving it.
If you found this article interesting, subscribe to receive information about my work and creative process, and also get access to my free ebook about becoming more creative.
![]()